Taxidermy4Cash.com
Mounting a North Atlantic King Eider
We are always very interested in Purchasing Victorian Taxidermy, please respond via this on-line form of what you have for sale. HERE
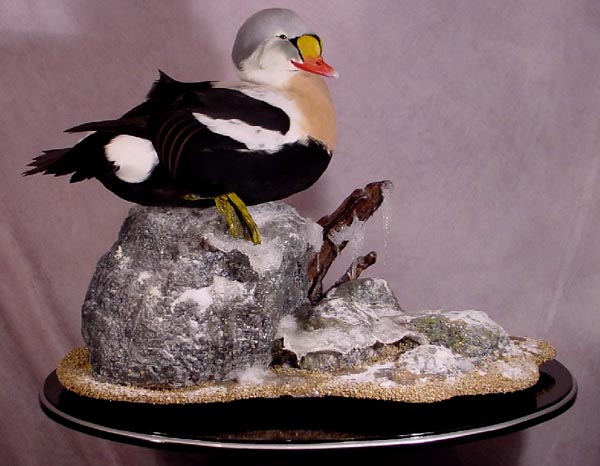
Completed King Eider drake mount, with associated groundwork
The mounting process
I am starting with a skinned bird. This particular bird will be using a cast head and feet, therefore I have altered the normal skinning process slightly.
To begin with, I skinned ventrally... then the customer decided he wanted artifical cast feet.. so... I to make things easier on myself.. I decided to change my ventral incision to a dorsal over the back, leg to leg incision. This allows me to completely remove the feet.
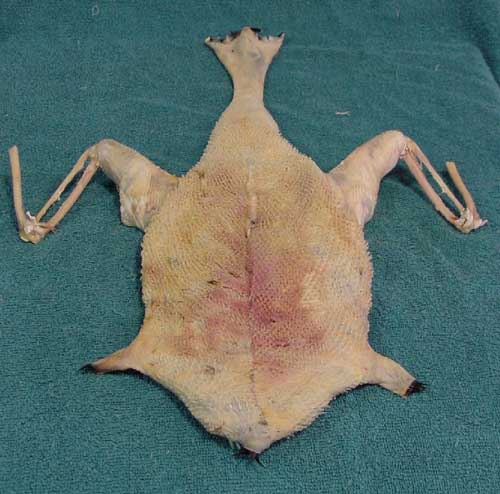
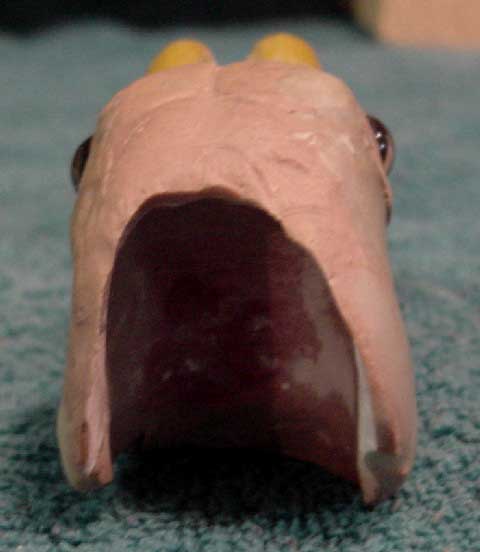
Breast side. Considering I already had the bird skinned ventrally, I went ahead and inverted the skin and sewed up my ventral incision from the inside. As you can see, I have a completely inside out bird now with no apparent incision.
.
Same skin only on the back side.. The side now facing me, is the back of the bird.

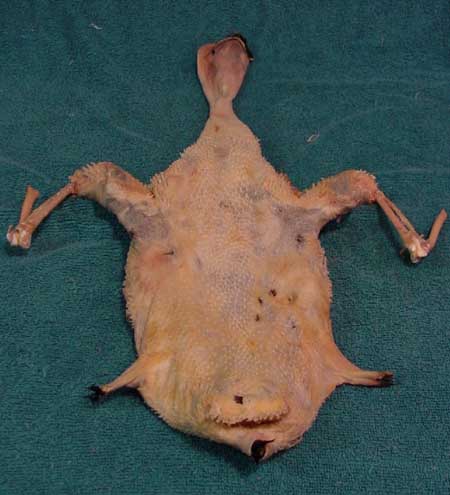
Here I have marked where I will make my dorsal leg to leg incision. You can clearly see the individual feather tracts here, and the lack of feather butts on the back side of the leg back towards the tail. I will follow this natural line to make my incision. The feet have already been removed at the feather line
With a sharp blade, simply incise across the back of the bird... You should be able to stay in-between a feather tract across the back. I'm about 1/2 inch above the back of the tail.
Here is the wet skin after I have rinsed all of the soap completely out and ran him through the spin cycle on the washing machine. I will now give him a soak in an acetone bath for about 10 minutes and then through the spin cycle again..
 After he comes out of the spin cycle for the last time, I use a shop vac on reverse and blow dry the skin. This is a critical point as most people don't get their birds feathers dry. By using just forced air, and no heat, I can spend additional time drying the bird. Notice, I did not tumble. If you take your finger and back brush the feathers, you can see if the down is dried. It should be quite fluffily. If your bird is completely dried.. It should already start to take shape and look like a bird long before you ever even put a body inside it..
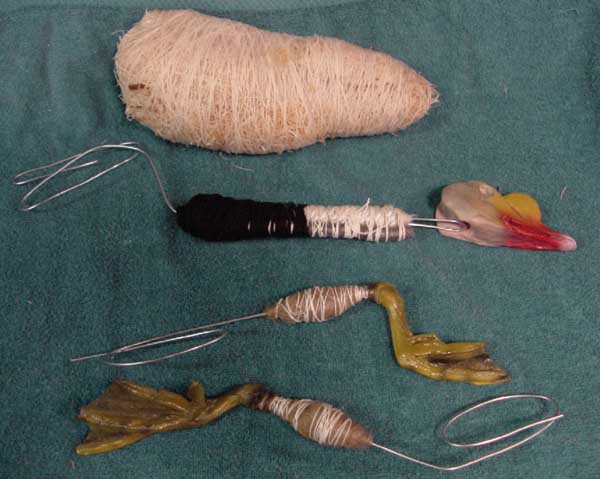
Here we have the parts ready to assemble. I am using a wrapped body, a wrapped neck, a cast head, and cast feet with a wrapped drumstick. The body of this bird was crushed during shipping or with the final kill, and was a loss.. There fore I had to use measurements out of the catalogue to aim for the right size body. The drumsticks were a loss as well. Therefore.. I erred on the side of caution and made everything a little smaller than what I felt they should be especially the drumsticks.. I would much rather be too small than too large.
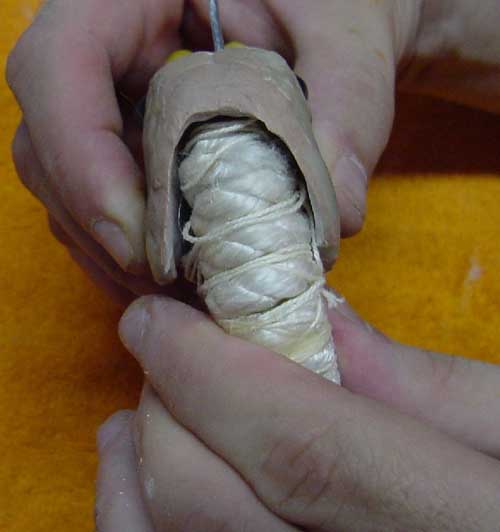
The neck is wrapped with Braided Nylon cord from Home depot glued around a piece of 14 guage wire. I then wrapped a piece of necking material along the bottom side to make the trachea. I then used yarn to wrap around the base of the neck as this bird had a very thick neck at the base.
The cast feet have a drumstick wrapped out of tow and secured with string.
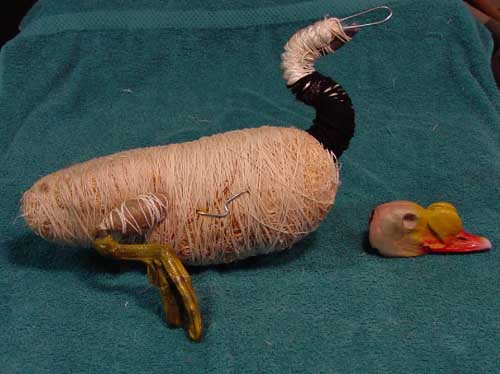
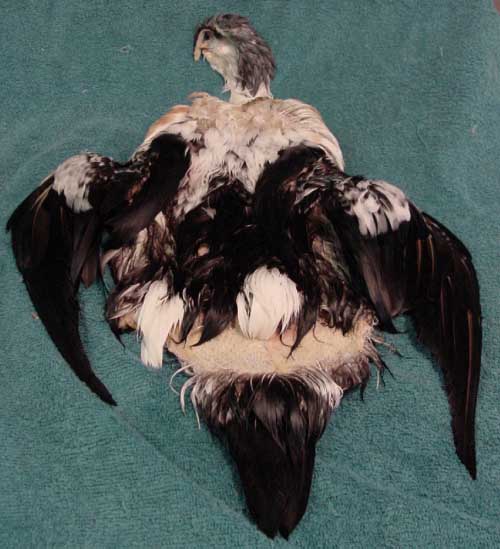
Here you see all the parts assembled minus the head. Notice the drumsticks do look rather small. I have done this intentionally in case I run into any problems posing the cast feet.
You can see where the opposite side leg wire has exited the form and has been cinched down. I will cover this with hot glue to ensure that it does not slip out during the mounting process.
 Inserting the form is pretty straight forward.. Slide the neck through pull the skin back on the body and while you have a mounted bird....(well almost).
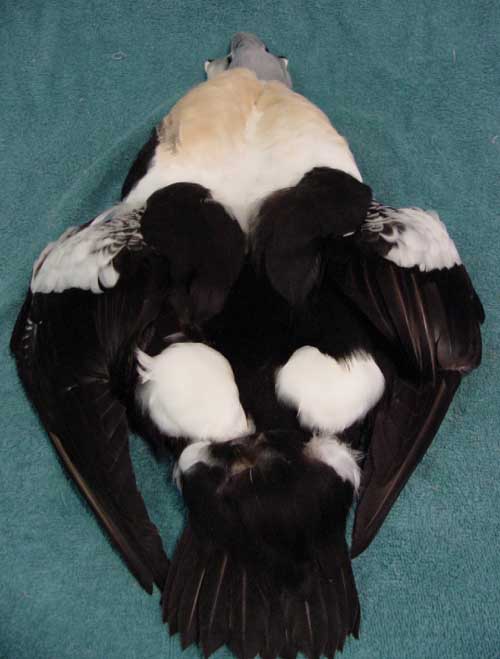
 Here he is with the skin over the form.... as you can see I have yet to sew him up.
To sew up the dorsal leg to leg, I start in the middle above the tail and work towards one leg. The leg skin will wrap around the bottom of the drumstick and then it can be glued down. It is really quite simple, and there is so much fuss back there that the chances of you seeing a seem are slim to nil. As far as competitions go, how often does a judge look there for a seam??.Here he is all sewed up now. Sorry I didn't take pics, but my fingers are so fat, you couldn't see anything anyways.. But it's just the same as sewing up a ventral incision.
Notice how everything is starting to take shape already. This is for the most part due to correct anatomy of the body. The feathers want to lay correctly on their own... with very little adjusting. I went ahead and pinned the wings in place just to get them out of the way. I will go over that a little later when we get farther along and grooming begins
.
Here he is with the skin over the form.... as you can see I have yet to sew him up.
To sew up the dorsal leg to leg, I start in the middle above the tail and work towards one leg. The leg skin will wrap around the bottom of the drumstick and then it can be glued down. It is really quite simple, and there is so much fuss back there that the chances of you seeing a seem are slim to nil. As far as competitions go, how often does a judge look there for a seam??.Here he is all sewed up now. Sorry I didn't take pics, but my fingers are so fat, you couldn't see anything anyways.. But it's just the same as sewing up a ventral incision.
Notice how everything is starting to take shape already. This is for the most part due to correct anatomy of the body. The feathers want to lay correctly on their own... with very little adjusting. I went ahead and pinned the wings in place just to get them out of the way. I will go over that a little later when we get farther along and grooming begins
.
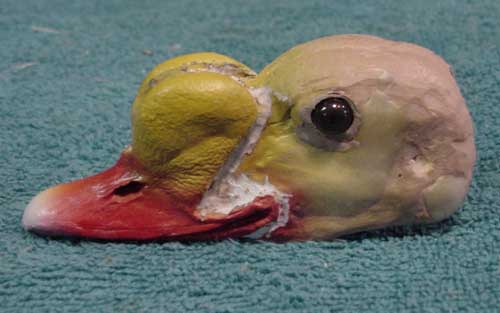 Head cast. Here is my cast head. I chose to cast it myself using alginate and thinned bondo vs buying one as this species is very individual in lobe size, to be accurate I chose to do this myself. I have set the eyes already. I am using a size 9mm Dark brown eye. The actual eye was about 8.5mm.. but a 9mm will work fine. The eyes should be placed even with one another from the top, and most importantly from the front. You can see this in future pics. They should also be angled in towards the front slightly to give the bird frontal vision..
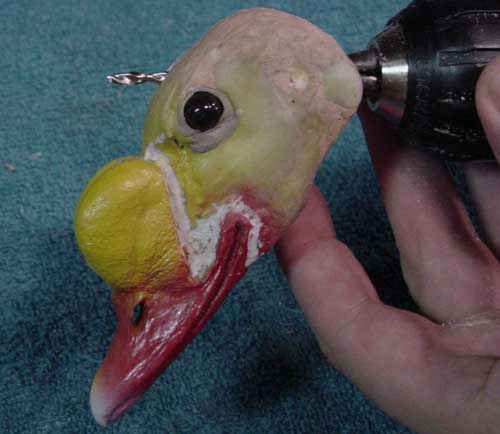
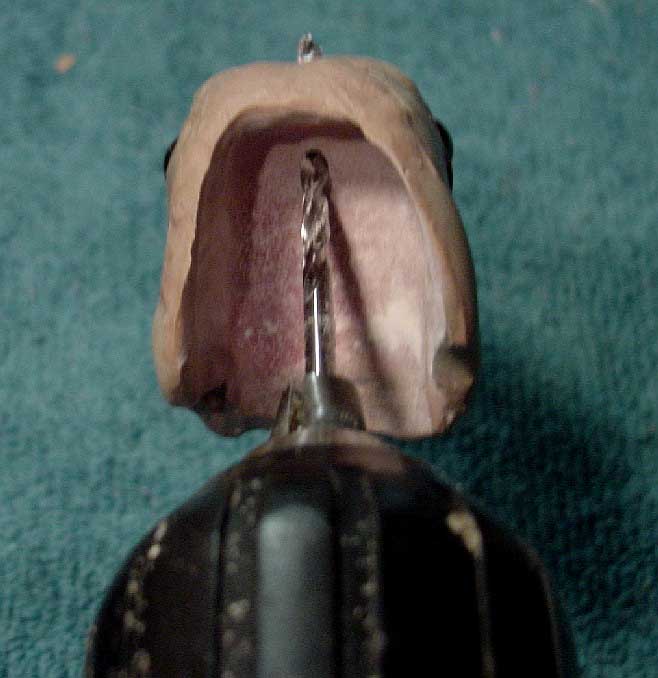
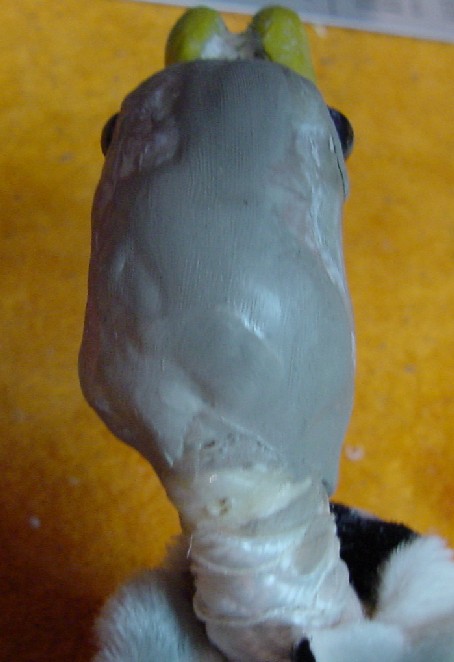
 Here you can see where I have dremeled out the back of the head to accept the neck. My eyes are slightly askew here, so I will need to adjust them properly..
 Head adjusting..
 Head adjusting..
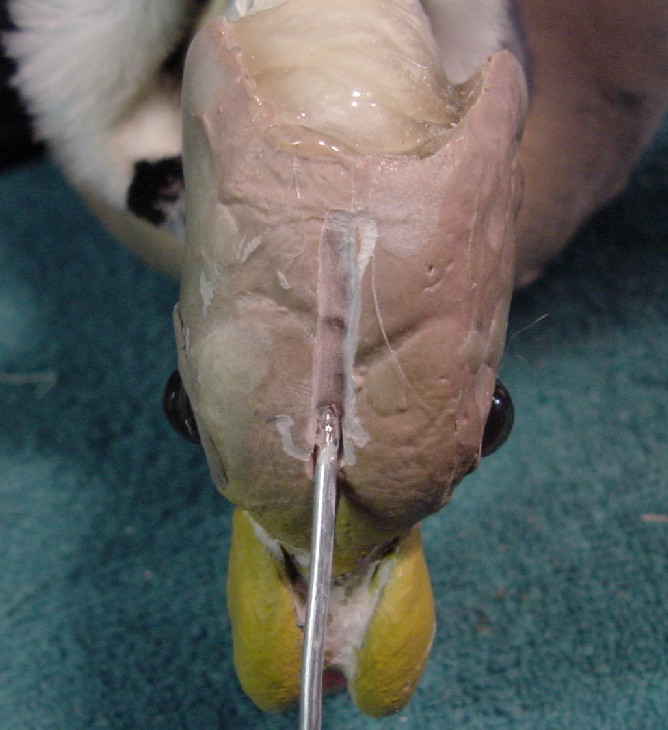
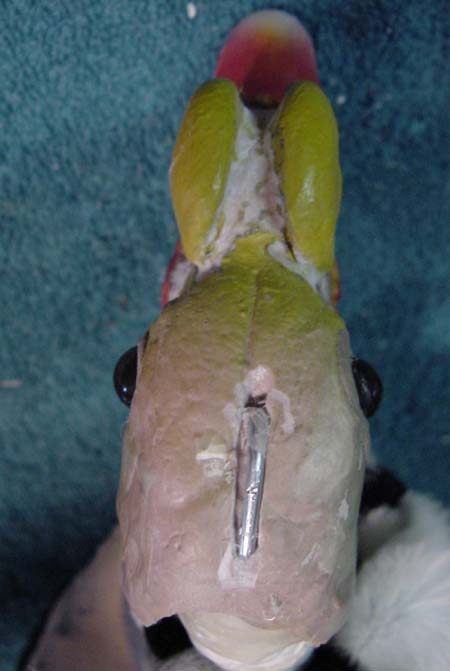
 In the previous three pics you can see the angle and position I have drilled the hole to accept the neck wire. You can also see where I have scraped the paint away from the edge of the bill to accept the super glue when the face skin gets glued in place..
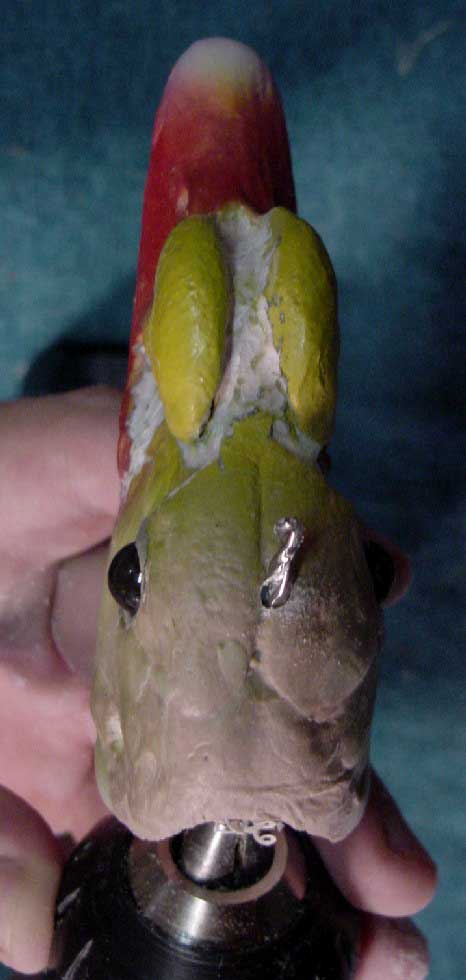
 Now we run our neck wire through the hole and test fit the neck into the back of the skull. If need be, you may have to go back and dremel some more out of the back. You want the back of the neck to be inside the head and flow naturally from the backside of the skull..
 Gluing and fixing.
 Gluing and fixing.
 Gluing and fixing.
 Gluing and fixing.
 Here you see I have sculpted in the bottom side of the trachea. This will start the curve in the neck which naturally starts to drop directly below the eye..
 Here I have smoothed over the back of the skull/neck junction to just to make sure there or no gaps which can alter how the skin dries later..
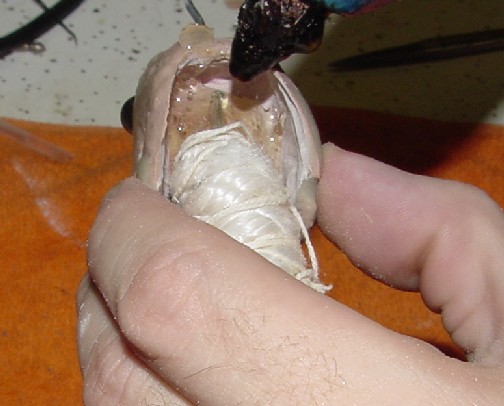
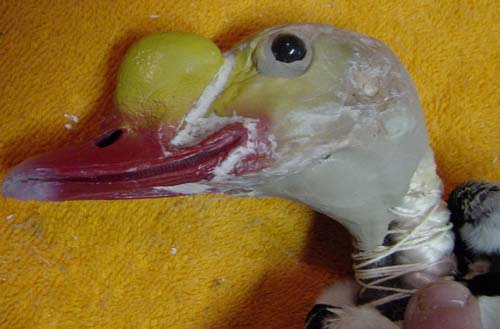
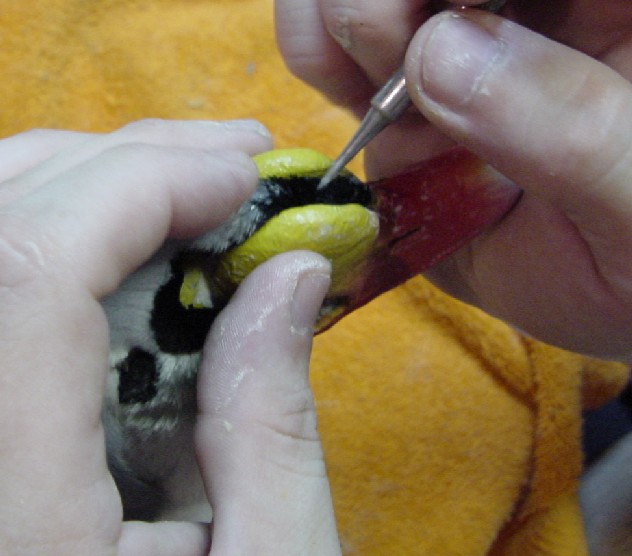
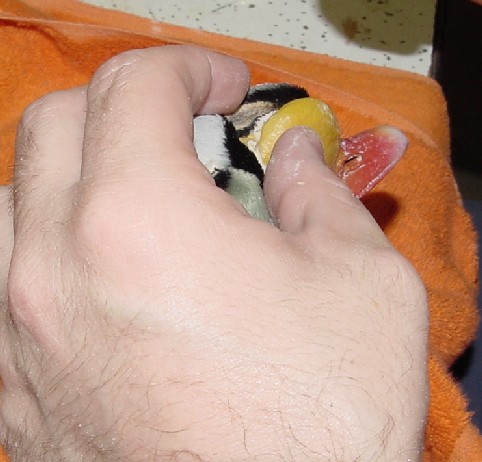
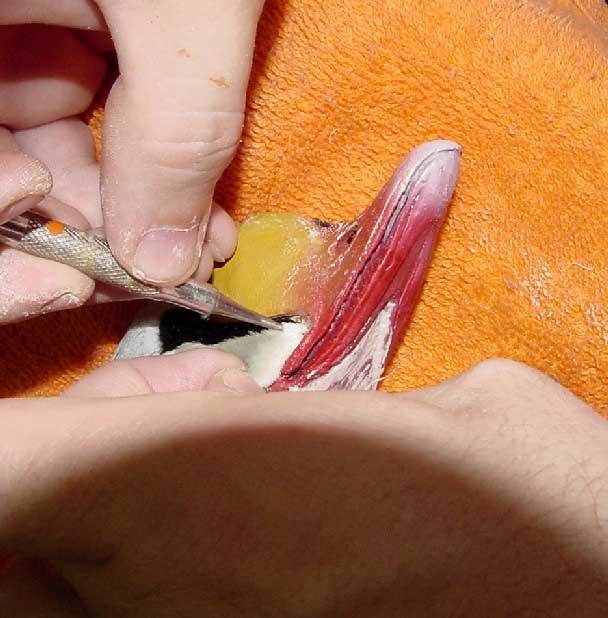
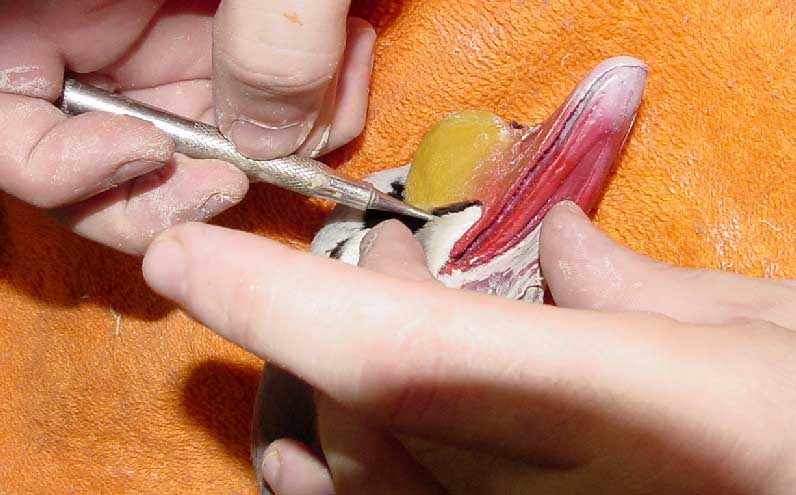
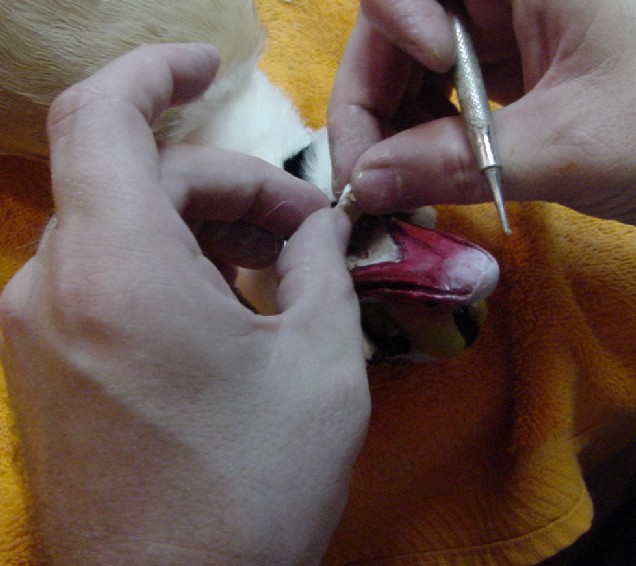
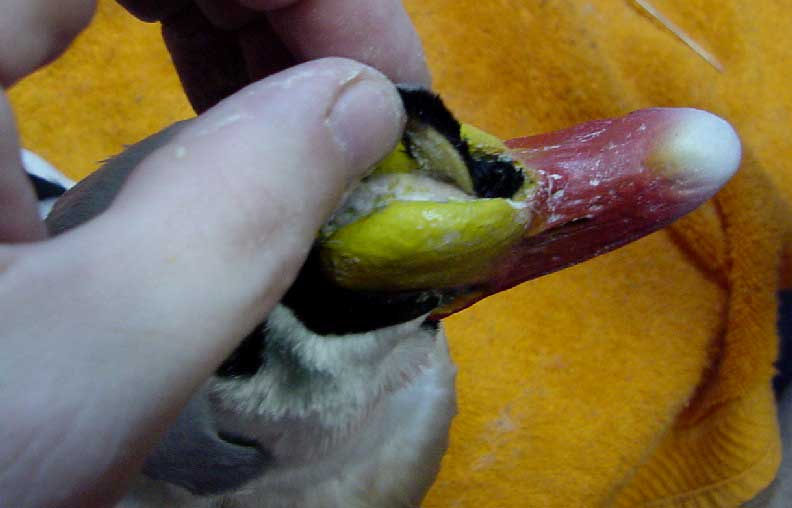 In the next series of pics I am gluing the skin around the bill. I previously scraped the paint away to make a good place for the glue to adhere to. I start with the top notch and then any key points where I KNOW that the skin was attached. This particular species has very defined places and markings making this very easy.
I am using a small dental tool with one side sharpened and the other side ground down into a blunt end. I dip the blunt end into my superglue and use it to place a small bead of glue around the edges of the bill. I then take the pointed end and pull the skin into place. I work in small sections one area at a time until I have glued completely around the entire bill.
.
In the next series of pics I am gluing the skin around the bill. I previously scraped the paint away to make a good place for the glue to adhere to. I start with the top notch and then any key points where I KNOW that the skin was attached. This particular species has very defined places and markings making this very easy.
I am using a small dental tool with one side sharpened and the other side ground down into a blunt end. I dip the blunt end into my superglue and use it to place a small bead of glue around the edges of the bill. I then take the pointed end and pull the skin into place. I work in small sections one area at a time until I have glued completely around the entire bill.
.
 Attending to the head area.
 Attending to the head area.
 Attending to the head area.
 Attending to the head area.
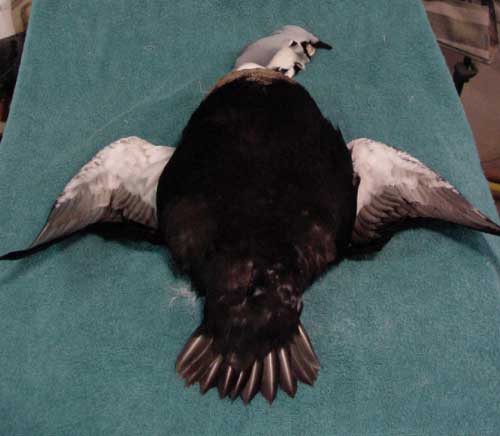
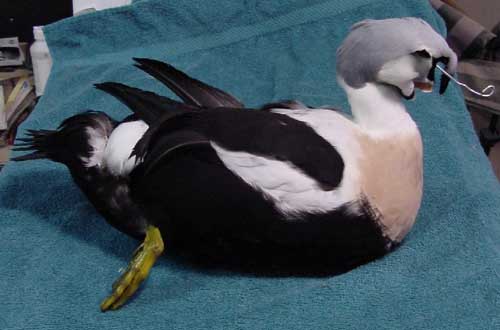
 Finally.. everything is in place and assembled.... Now come the fun part.. Putting the feathers where they go.
In the previous pics though, you saw that for the most part the bird looked like a bird...now all we have to do is make it look like a living creature and not just a stuffed bird.
The head was positioned by bending the neck and I adjusted the legs to a natural position and now I am getting ready to position the wings.
.
Finally.. everything is in place and assembled.... Now come the fun part.. Putting the feathers where they go.
In the previous pics though, you saw that for the most part the bird looked like a bird...now all we have to do is make it look like a living creature and not just a stuffed bird.
The head was positioned by bending the neck and I adjusted the legs to a natural position and now I am getting ready to position the wings.
.
 Here I have pulled up the wing and you can clearly see the pocket for it to lie in..
 Here I have a hold of the large wing bone and have positioned it up into the shoulder where it should go. I am now going to take a pin and pull the skin over the ribcage up into place and place a pin right under the bone which will hold the bone in place while I place the rest of the wing.
 Here I have folded the wing, making sure all the feathers (secondaries and primaries) are all stacked properly and am placing the wrist joint into the front of the side pocket..
 Now I guide the rest of the wing down into the side pocket. It wants to fall there anyways..
 Now I take a "T" pin and pin the wing between the ulna and the radius. This pin is pushed up taught and is covered by the covert feathers. It will remain the mount..
 Now that both wings are in place.. I am going to position the scaps and tertials. The scaps are the feathers that cover the top of the wing..
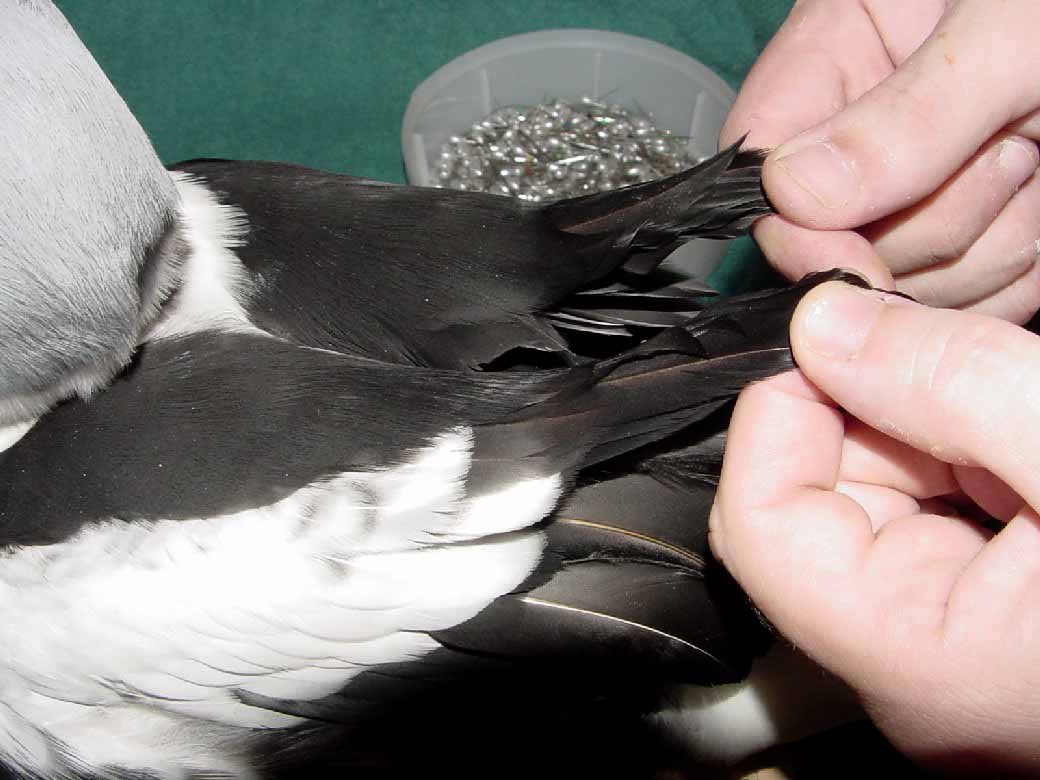 The scaps have probably gotten wedged under the wing at this point. Therefore I will pull them out and up.. This motion will generally allow them to lay into place atop the shoulder..
 Here I am pulling up the tertials. These feathers are the group that are right before the secondaries. They fall in different places on different species.. REFERENCE REFERENCE REFERENCE!!!!.
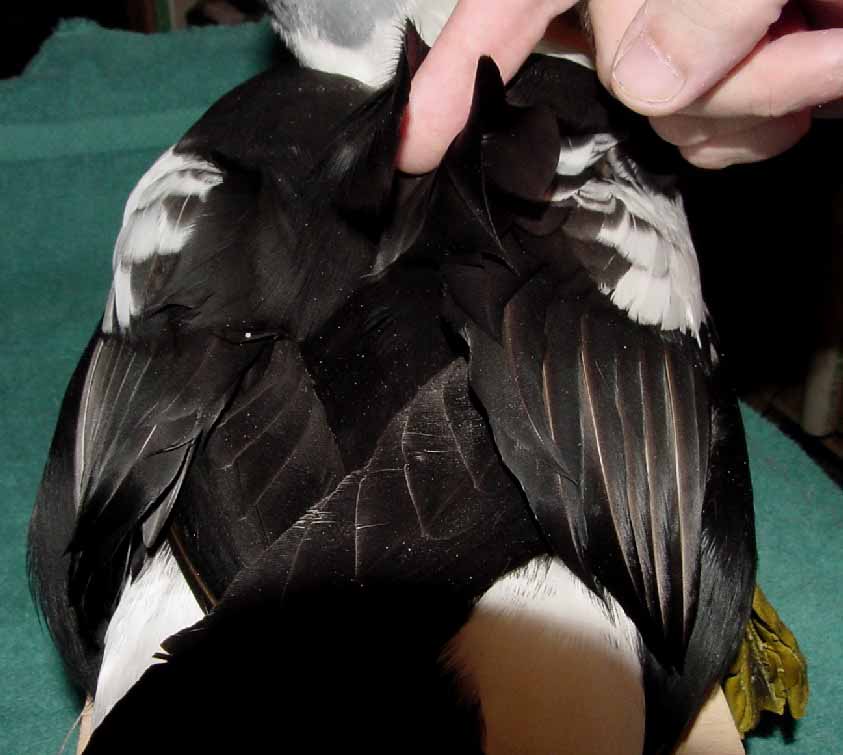
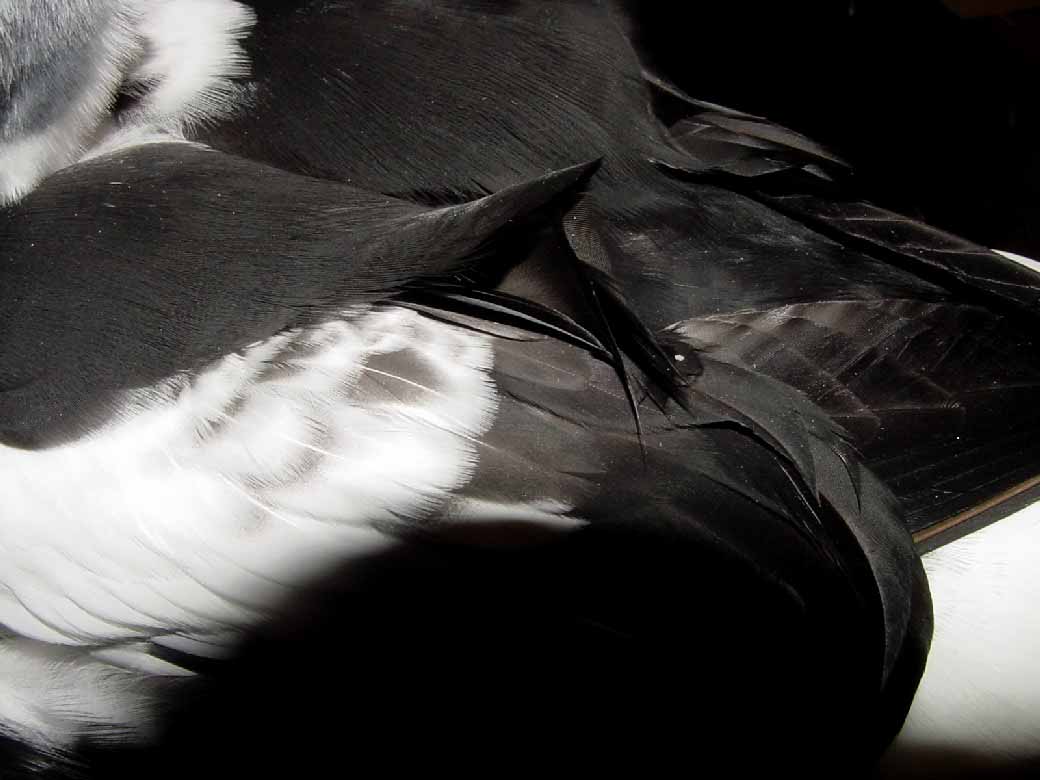 This species of waterfowl also have a specialized set of scapulars that form small wings. Close inspection reveals that these feathers are actually curled back so that the underside of the feather is facing out. In this pic I have lifted the scapulars and separated these feathers out.. Let them do their thing.. Without the weight of the scaps they will fall back into place and then the scaps can be laid back over them so that they show.
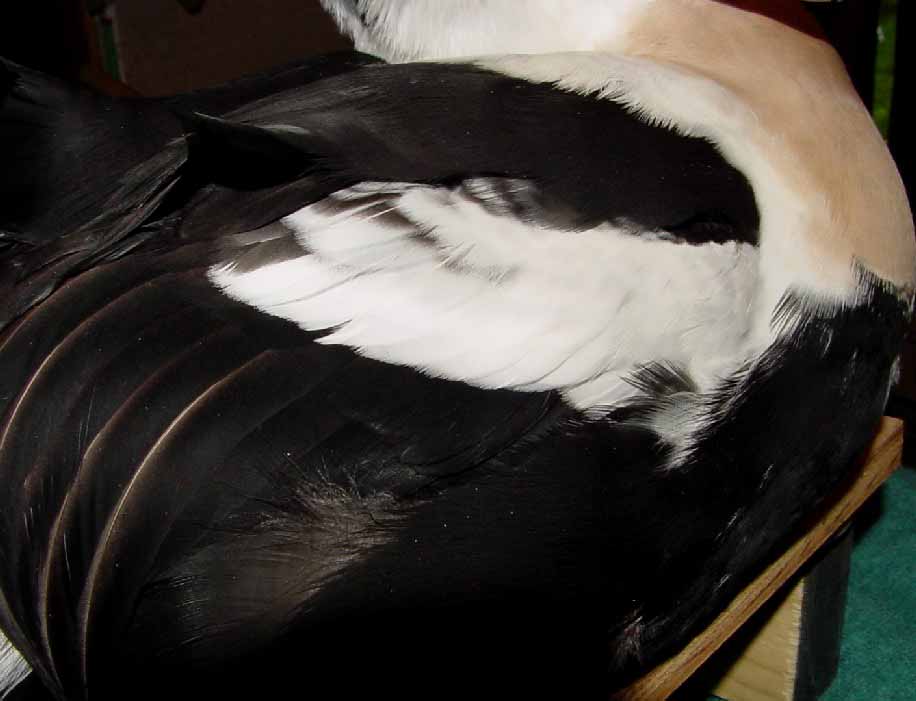
You can clearly see the tertials here and how they drape over the back side of the wing and side pocket.
.
This species of waterfowl also have a specialized set of scapulars that form small wings. Close inspection reveals that these feathers are actually curled back so that the underside of the feather is facing out. In this pic I have lifted the scapulars and separated these feathers out.. Let them do their thing.. Without the weight of the scaps they will fall back into place and then the scaps can be laid back over them so that they show.
You can clearly see the tertials here and how they drape over the back side of the wing and side pocket.
.
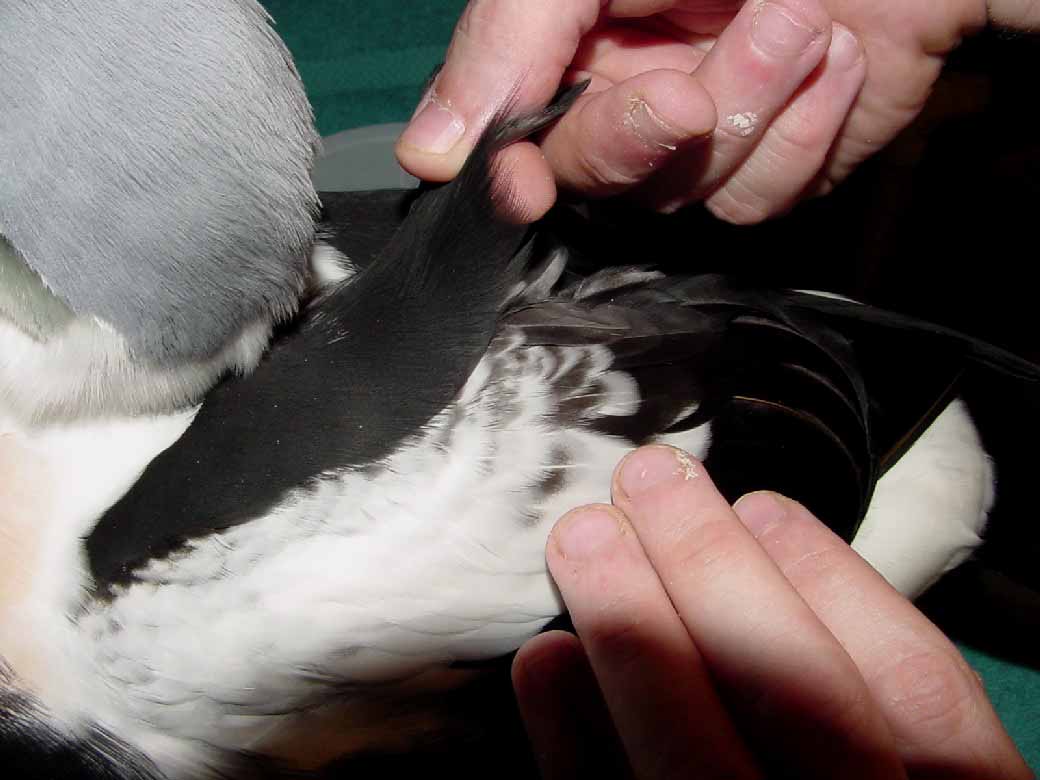
 I start with the body and work my way to the head of the bird when it comes to preening. I don't think it really matters where one starts, but attention to detail is the key here.. One of the most asked questions I get is "how do you make your birds look so smooth??" Well.. It takes time. and patience... a couple pair of tweezers and a couple poking tools or pins.
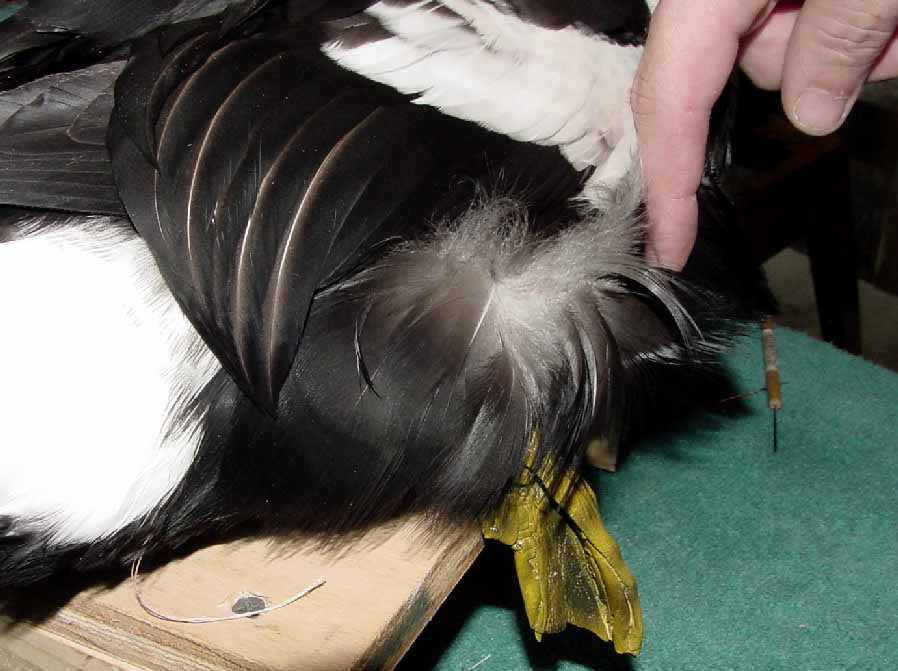
I usually start with what bugs the most first. In this case,.. I had wing coverts out of place.
.
I start with the body and work my way to the head of the bird when it comes to preening. I don't think it really matters where one starts, but attention to detail is the key here.. One of the most asked questions I get is "how do you make your birds look so smooth??" Well.. It takes time. and patience... a couple pair of tweezers and a couple poking tools or pins.
I usually start with what bugs the most first. In this case,.. I had wing coverts out of place.
.
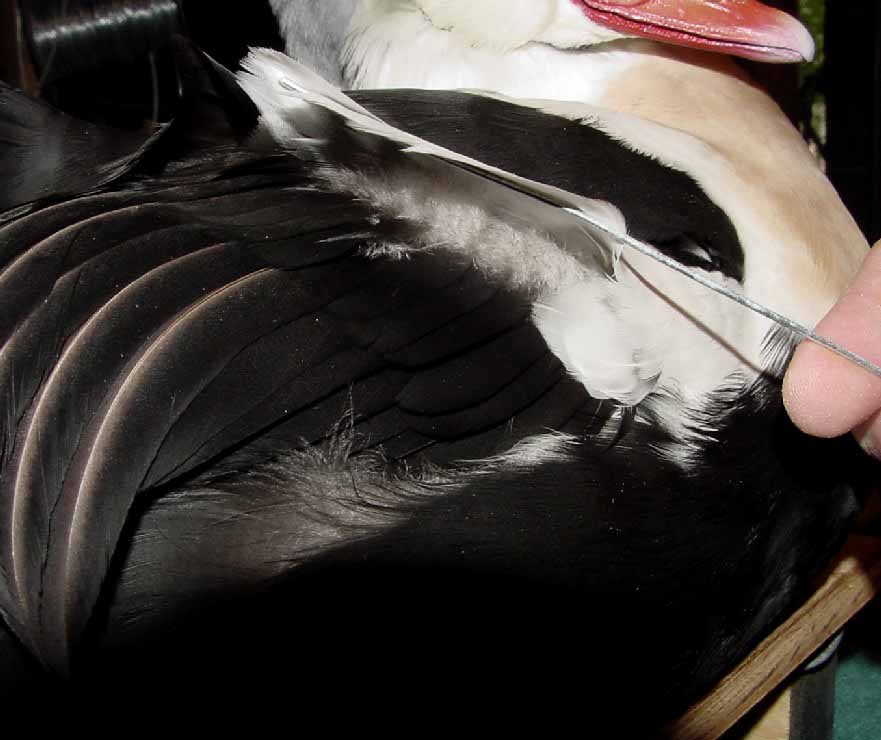
 Feathers lay in defined tracts.. and they have a specific order in which they fall...Sometime you can't see it if they are out of order, but if they are.. A simple pair of tweezers or long pin is needed to lift one feather and place another under it. Back brushing with a finger works great to fluff out the breast, side pockets, head... .
 Feathers lay in defined tracts.. and they have a specific order in which they fall...Sometime you can't see it if they are out of order, but if they are.. A simple pair of tweezers or long pin is needed to lift one feather and place another under it. Back brushing with a finger works great to fluff out the breast, side pockets, head... .
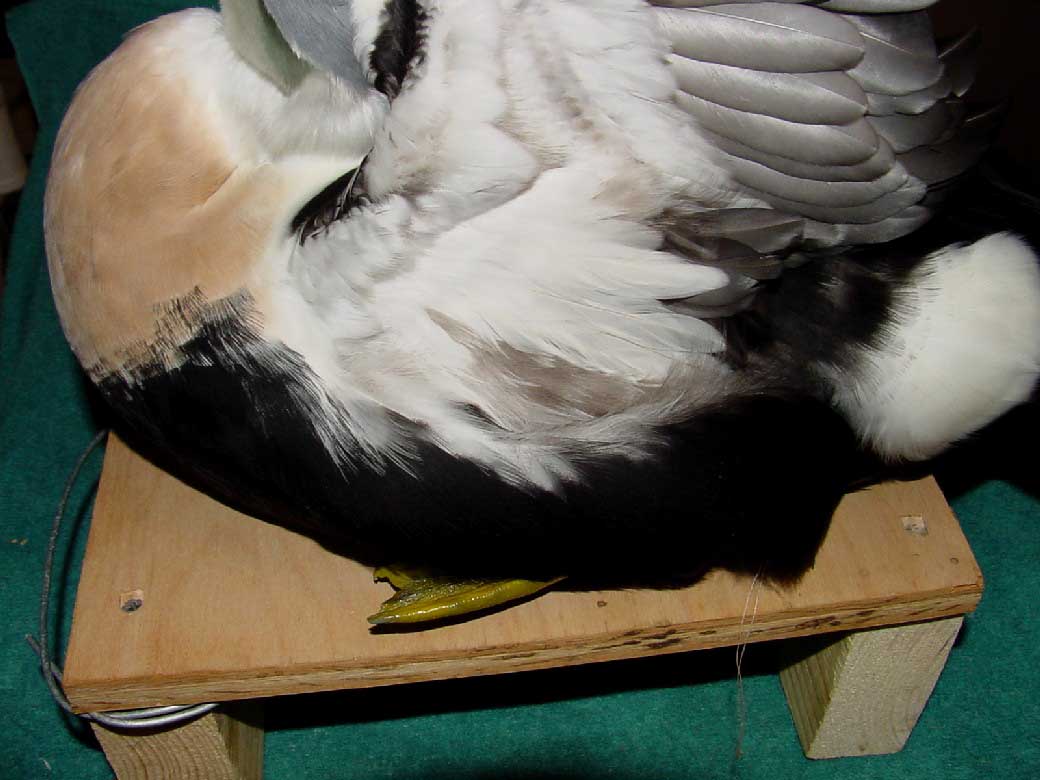
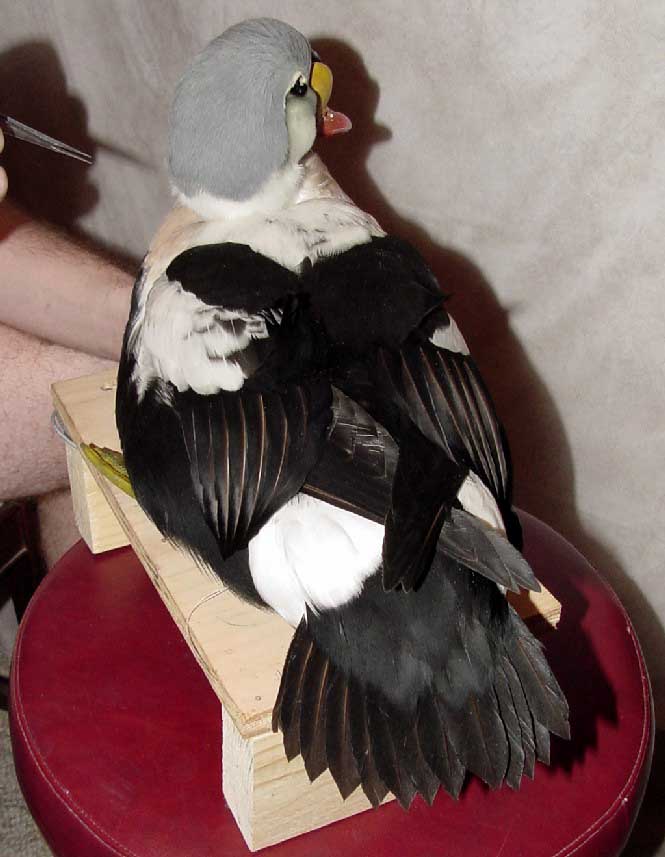
 The following pictures are just miscellaneous pics of me grooming the bird.. Head grooming for feather placement.
 Head grooming for feather placement.
 The following pictures are just miscellaneous pics of me grooming the bird..
 Notice that the primaries are crossing nicely and are even with one another.. As a general rule birds are symmetrical.... what happens on one side, happens on the other..
 The following pictures are just miscellaneous pics of me grooming the bird..
 Don't be afraid to pluck that feather that just doesn't want to conform....they have plenty.. trust me..
 The following pictures are just miscellaneous pics of me grooming the bird..
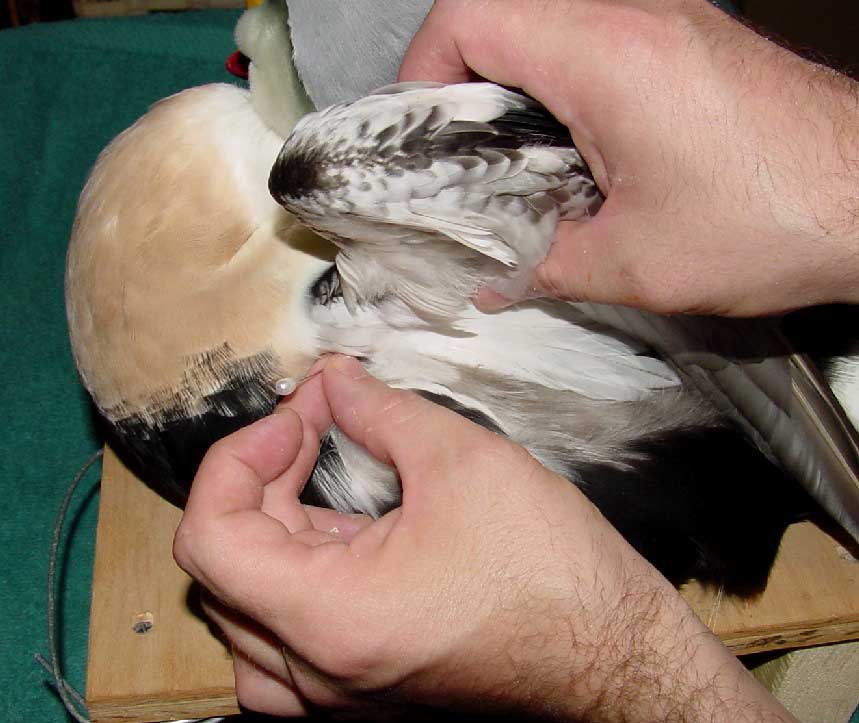
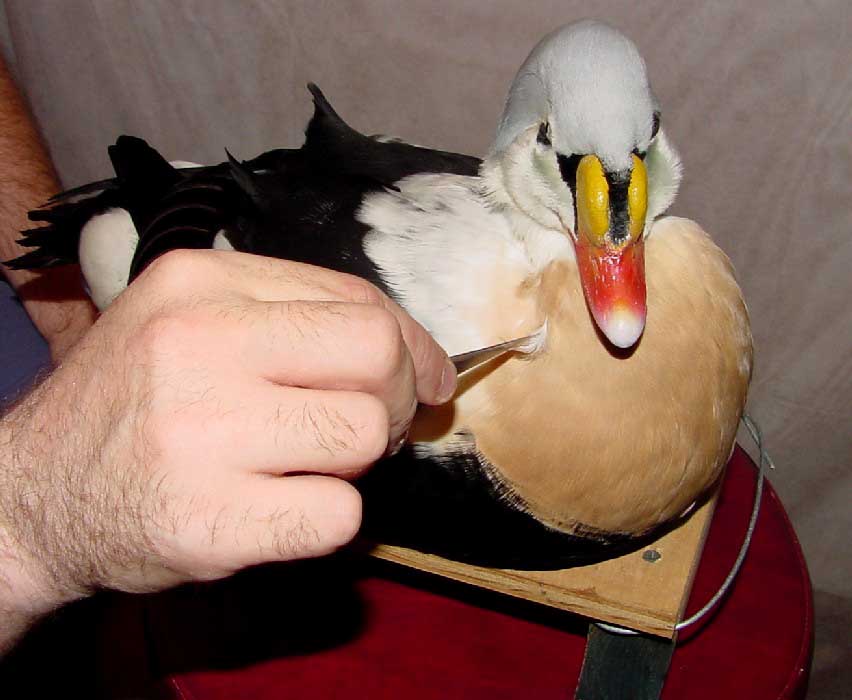
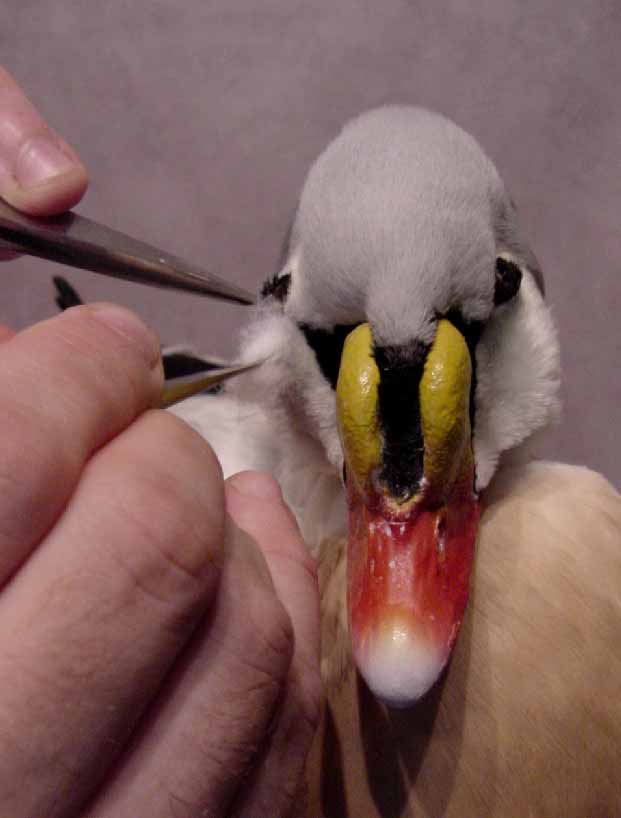
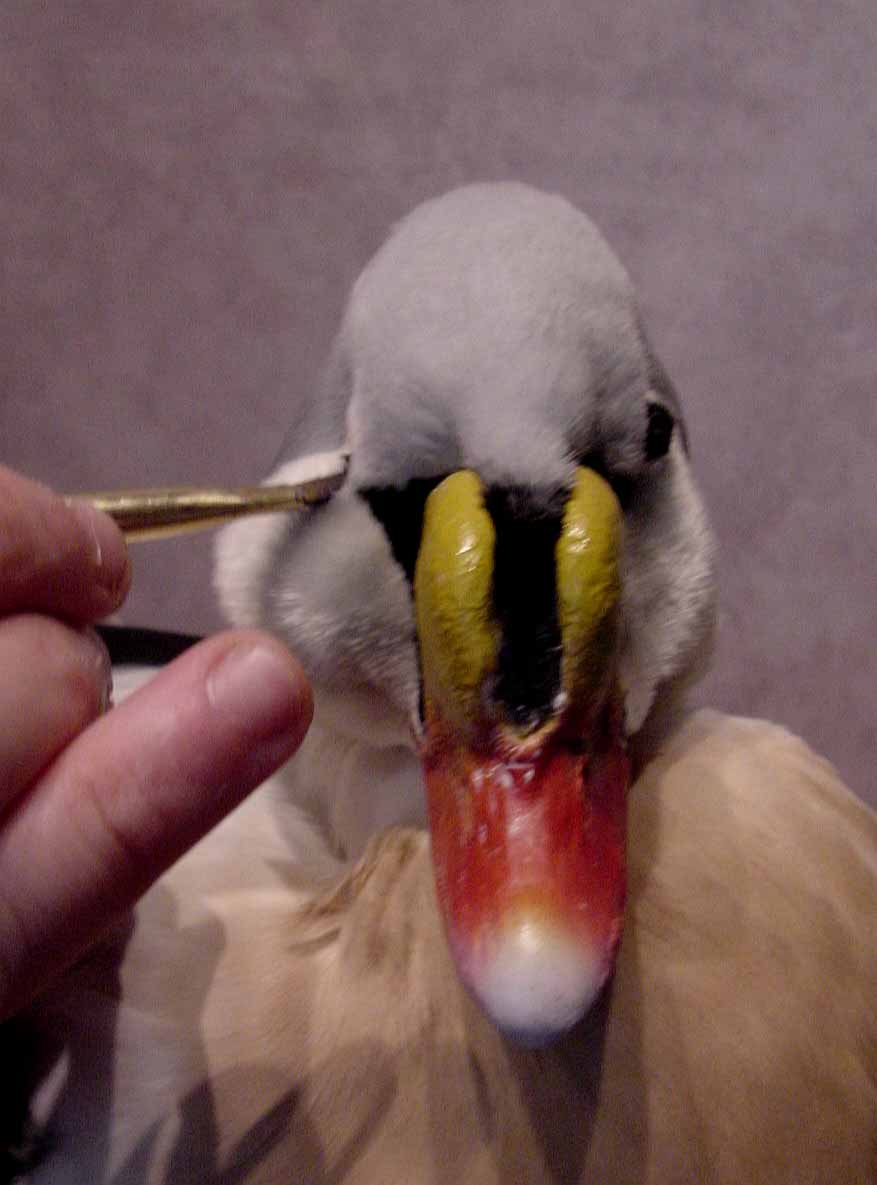
 Here we have a very flat face with no expression. By taking some cotton and filling out the cheeks some we can change that 100%.
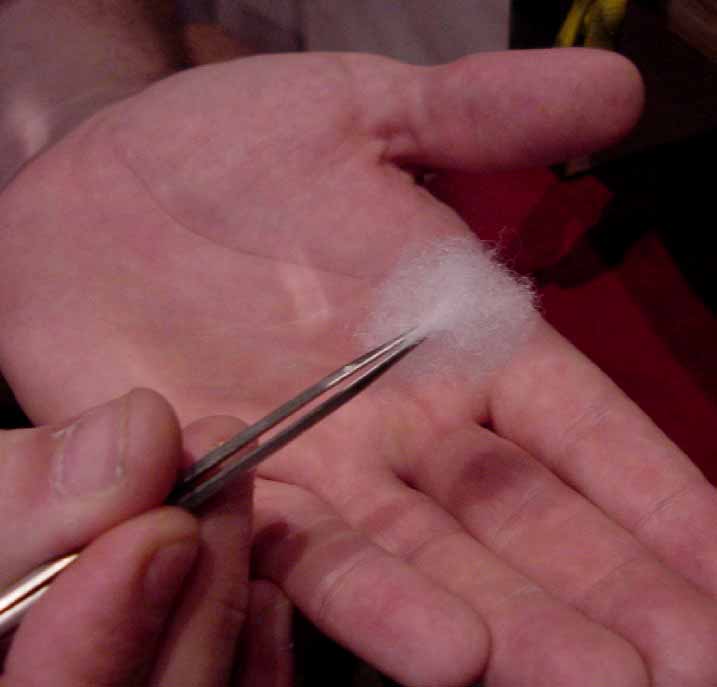 Using tweezers, I take a small amount of cotton, about three pieces this size. and insert them into the lower neck and back of the cheeks. I use a thin pair of tweezers for this and go through the eye hole..
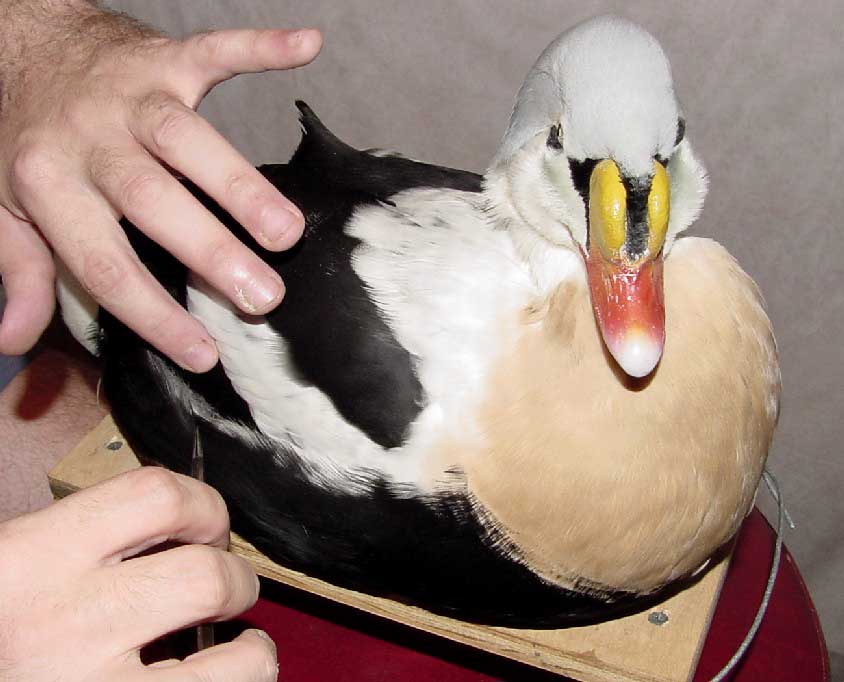
 I can now use the tweezers to fluff the cotton on the inside of the skin and move it around to get a natural look...
 I can now use the tweezers to fluff the cotton on the inside of the skin and move it around to get a natural look...
 Here I'm using a tweezers to pull the cotton around on the inside of the cheek to make both sides match..
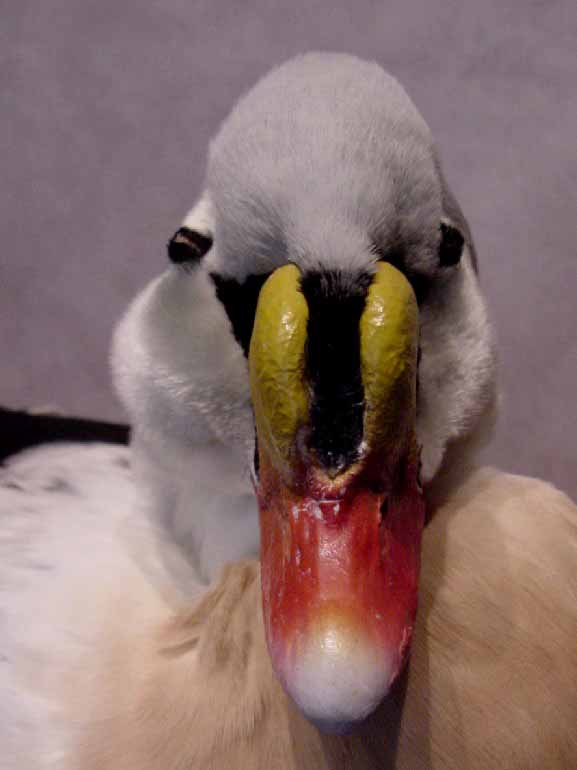
 cheek development of the bird to get that more realistic look..
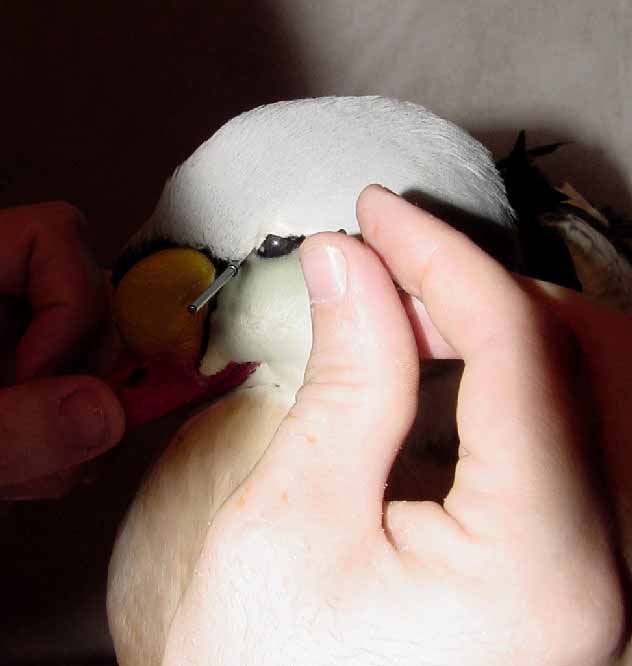
 Eye pining.
 My eyelids have dried a little so I'm taking a brush with water and relaxing them.
A good mount is a mount that has expression in its eyes. That is achieved by attention to detail once again and placement of the eyelids... Yes... birds do have eyelids and they fall in a certain place.
.
My eyelids have dried a little so I'm taking a brush with water and relaxing them.
A good mount is a mount that has expression in its eyes. That is achieved by attention to detail once again and placement of the eyelids... Yes... birds do have eyelids and they fall in a certain place.
.
 Not behind the eyes, not at the edge of the eye, but the actually have a shape to them and the lay SMOOTHLY on the glass eye itself. Some people like to glue their eyelids in place, but superglue and eyes scare me, so I just use the conventional method of pinning them taught and in place..
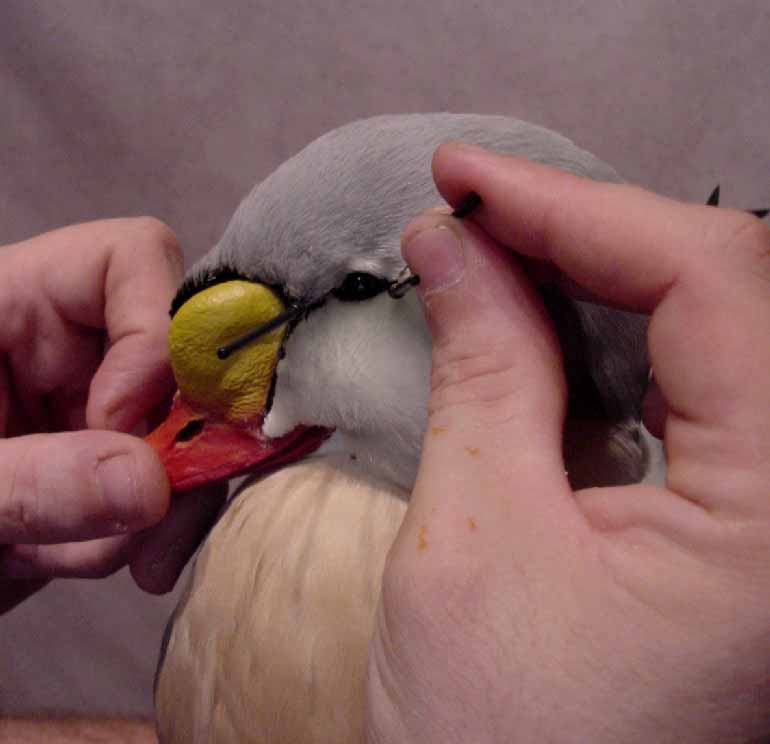 I then place another pin at the rear. The bottom lid has a little pocket so to speak. The pin needs to be at the top edge of this pocket. That same little pocket will get tucked under the cheek skin and the lid pulled up over the bottom of the glass eye. The top lid is shaped by using a tweezers or pin/i>.
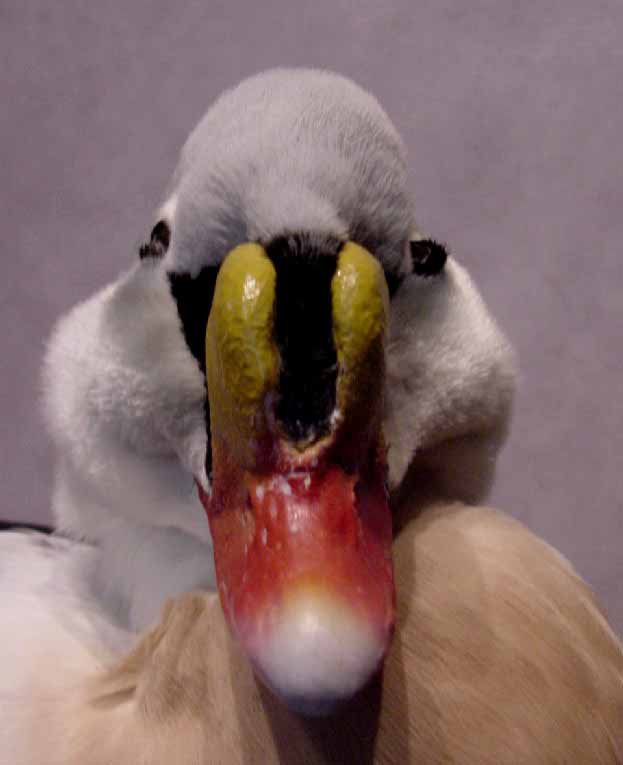
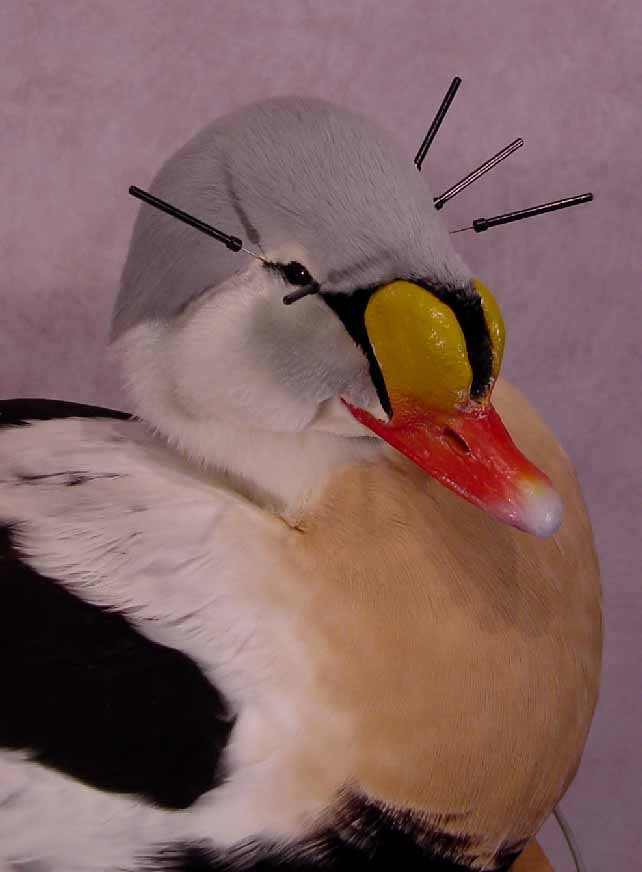
 Eye area in detail.
 Eye area in detail.
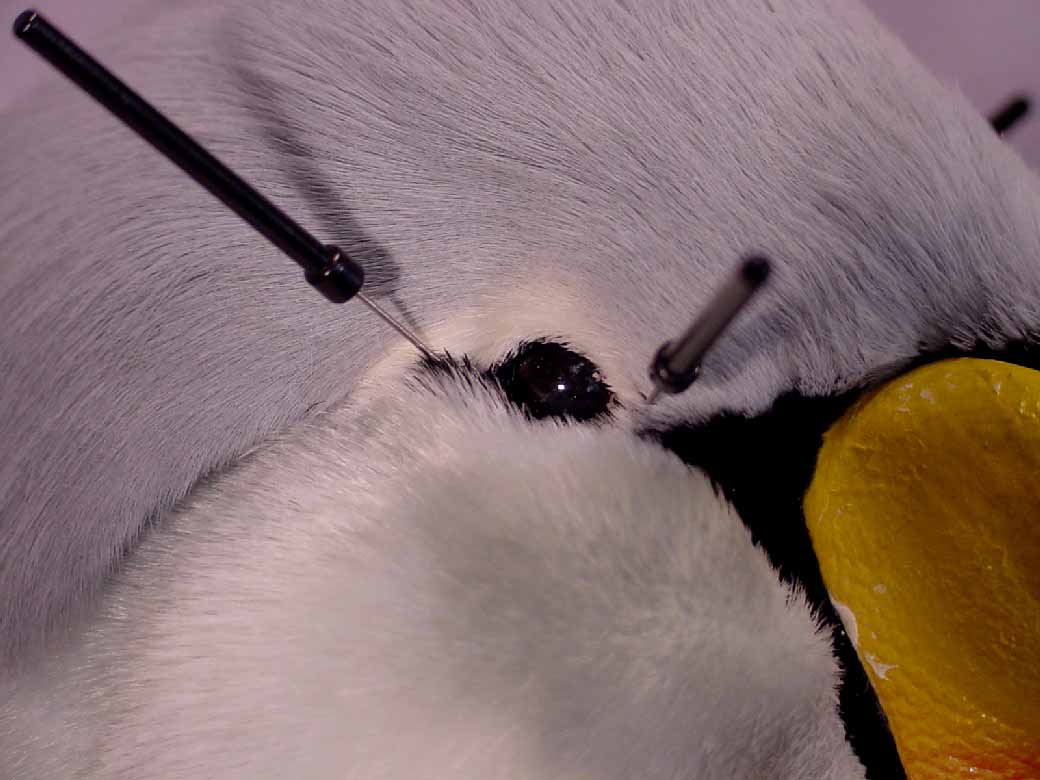 Eye area in detail.
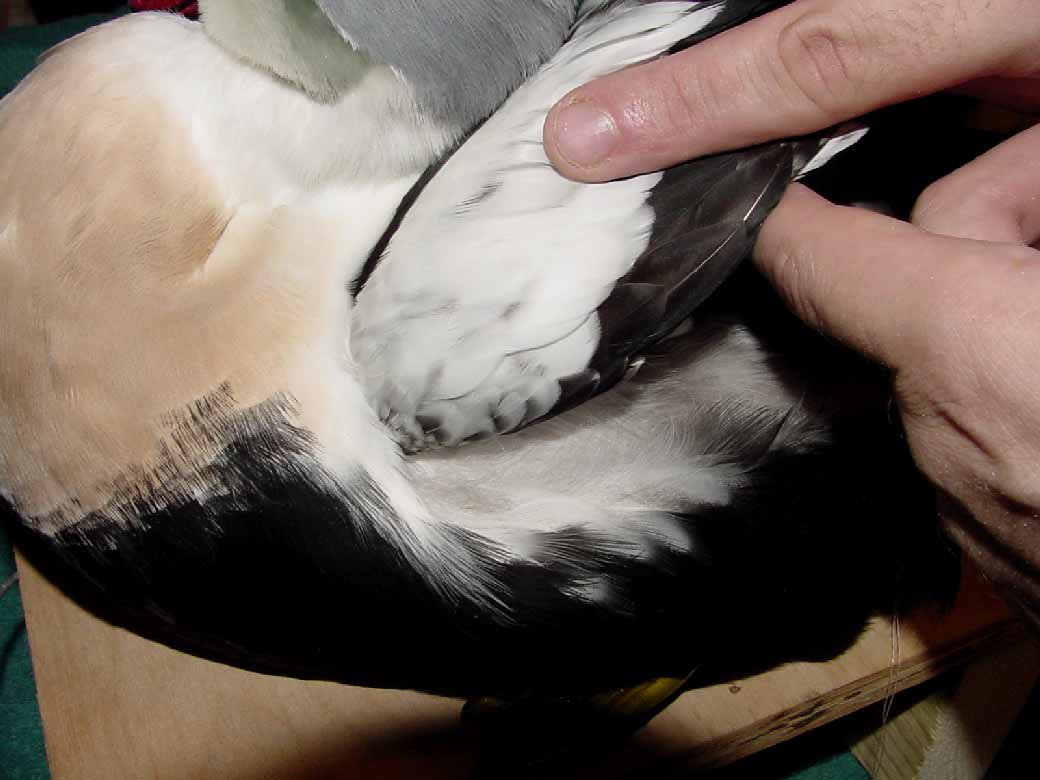
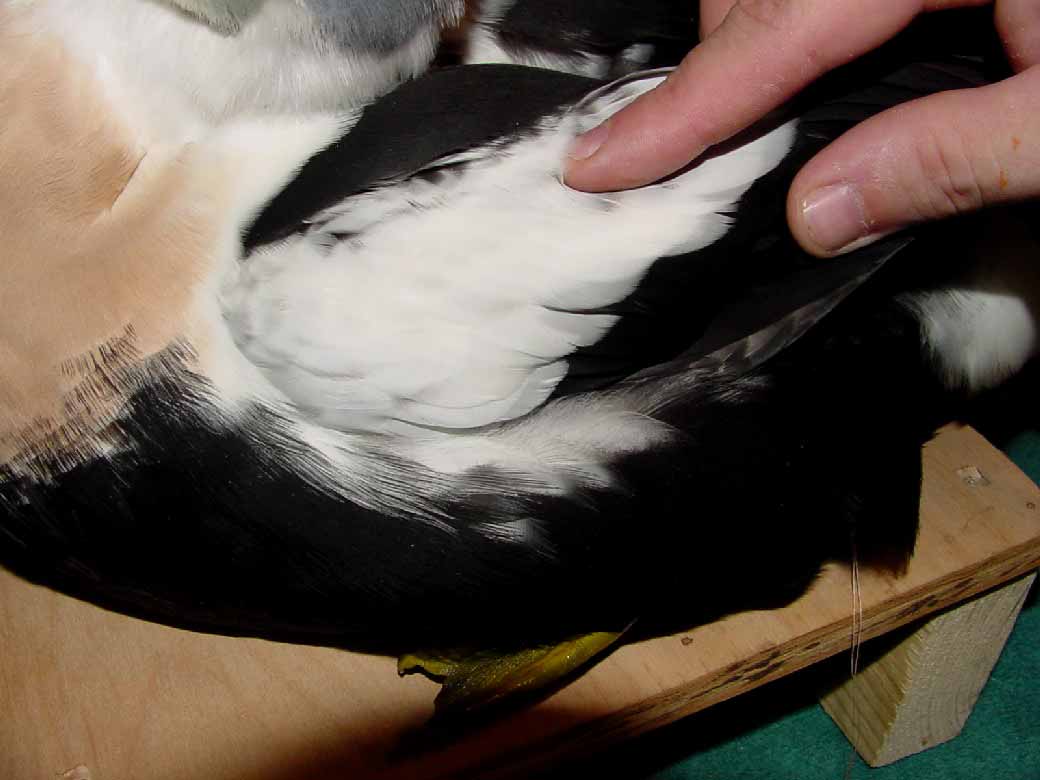
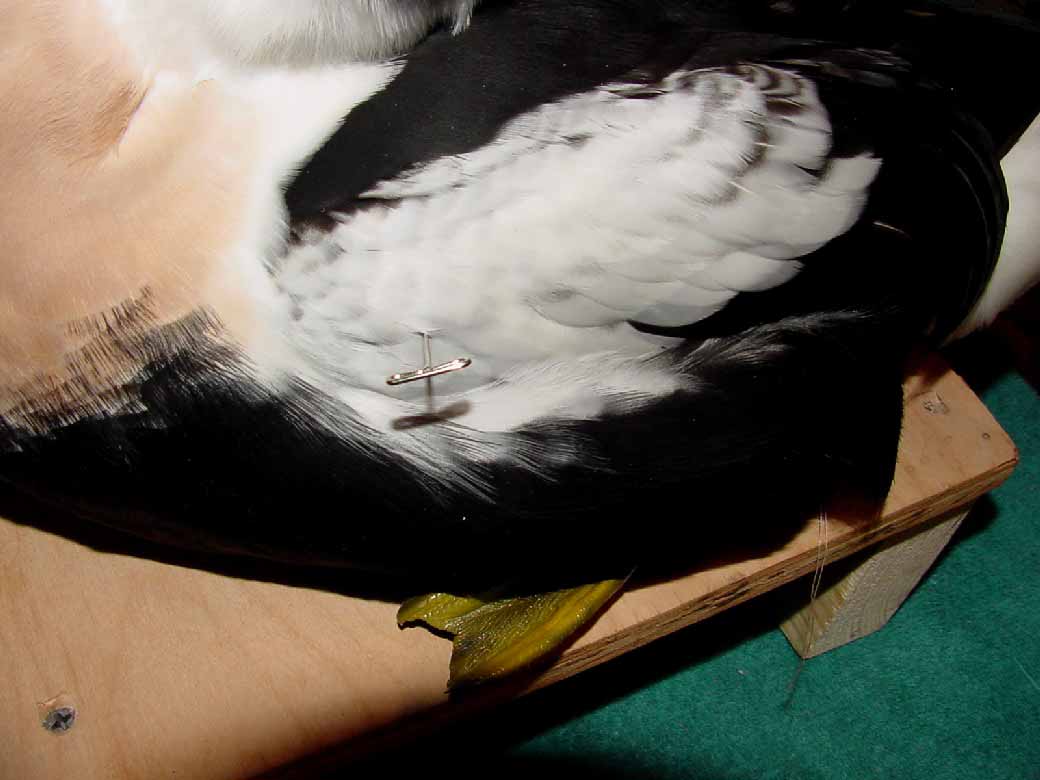
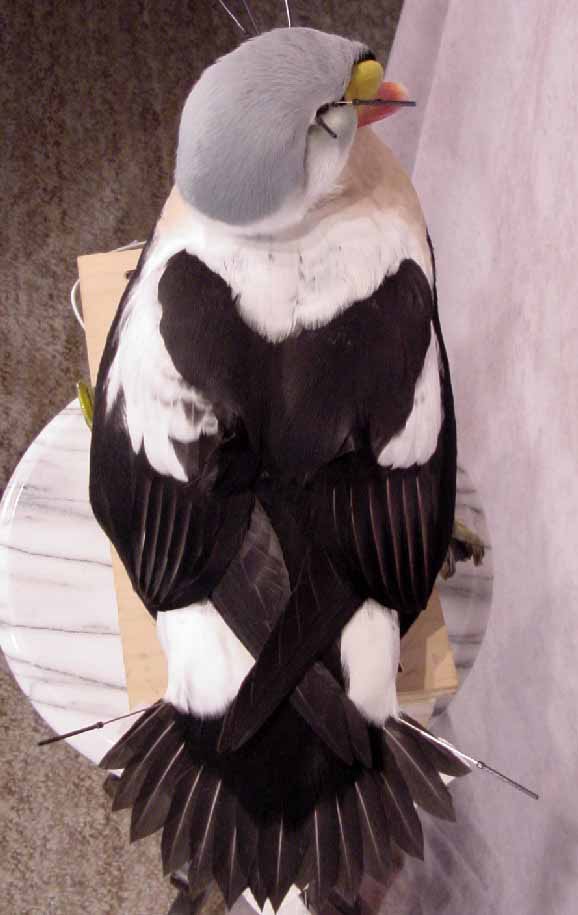
 Tail area in detail..
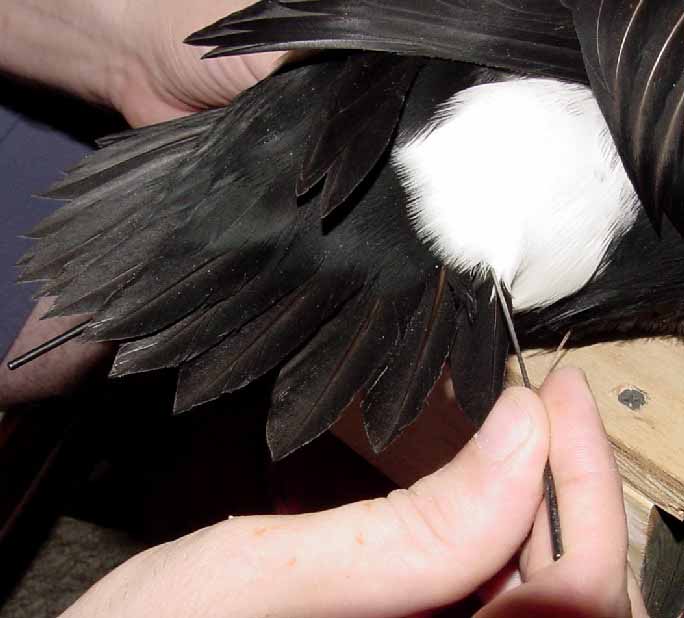 Tail area in detail..
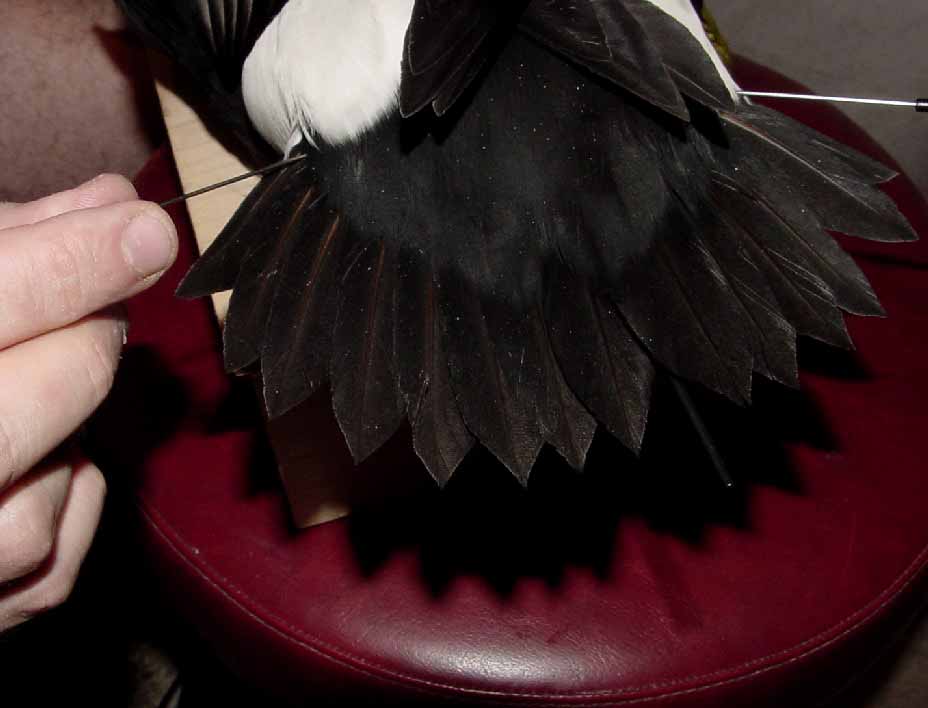 and then using another pin I will grab the outermost tail feather on each side and pin them into the desired spread. Then a little masking tape on the underside of the tail to make sure they dry flat. and we're done..
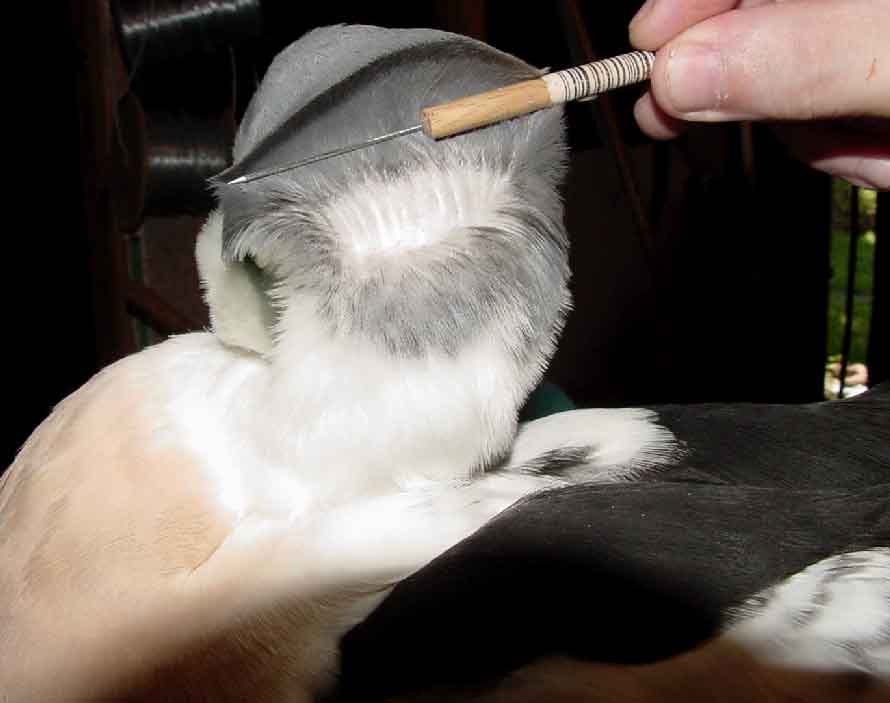
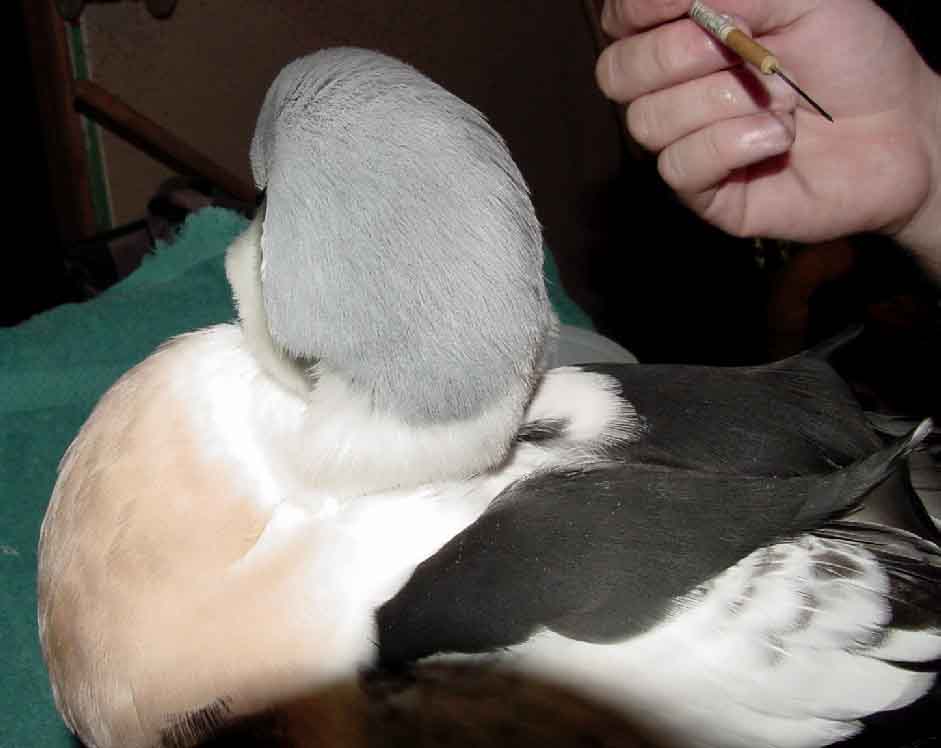
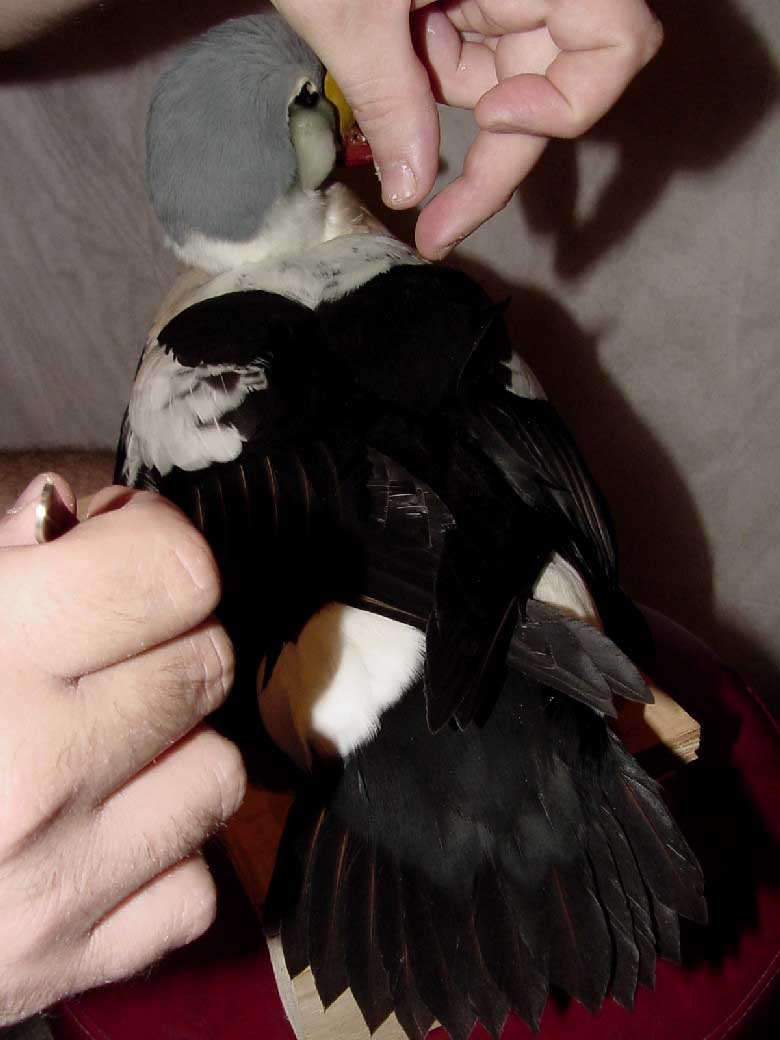
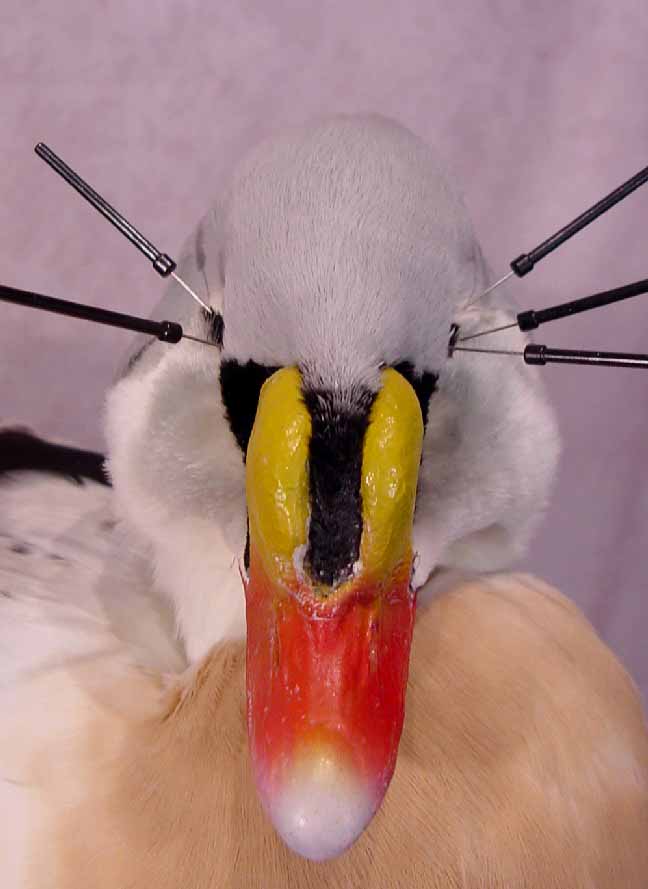
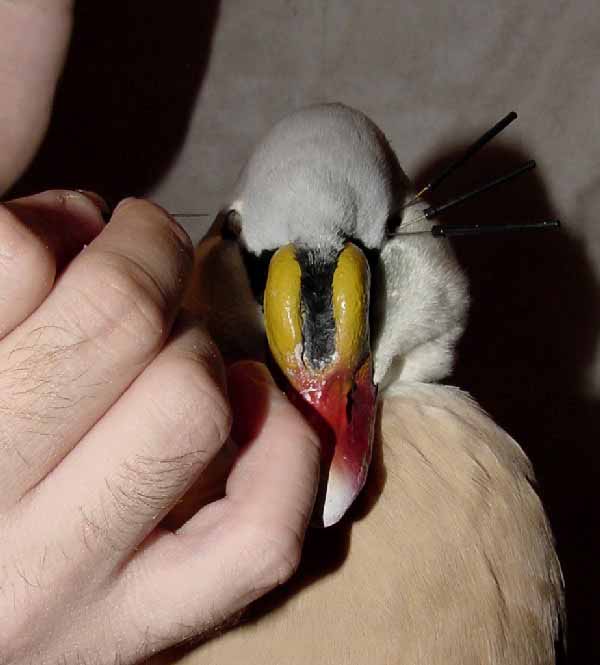
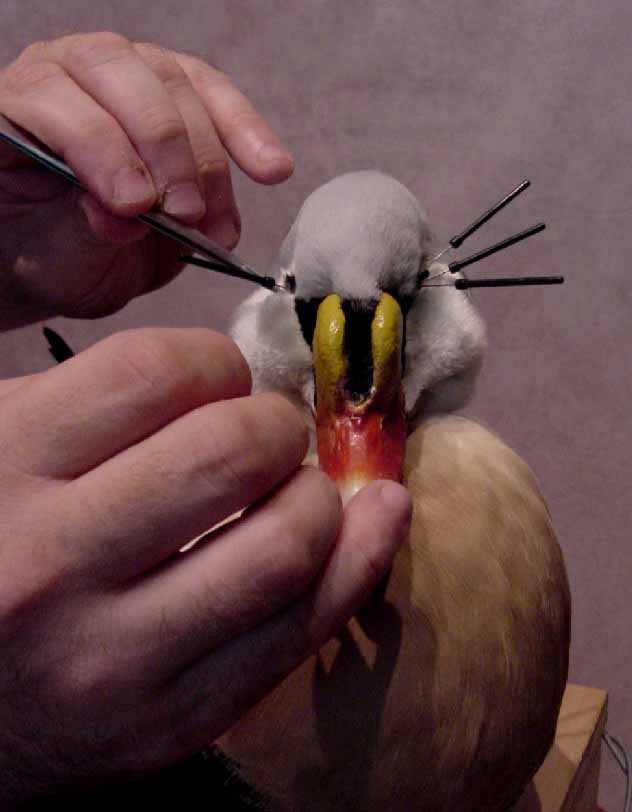
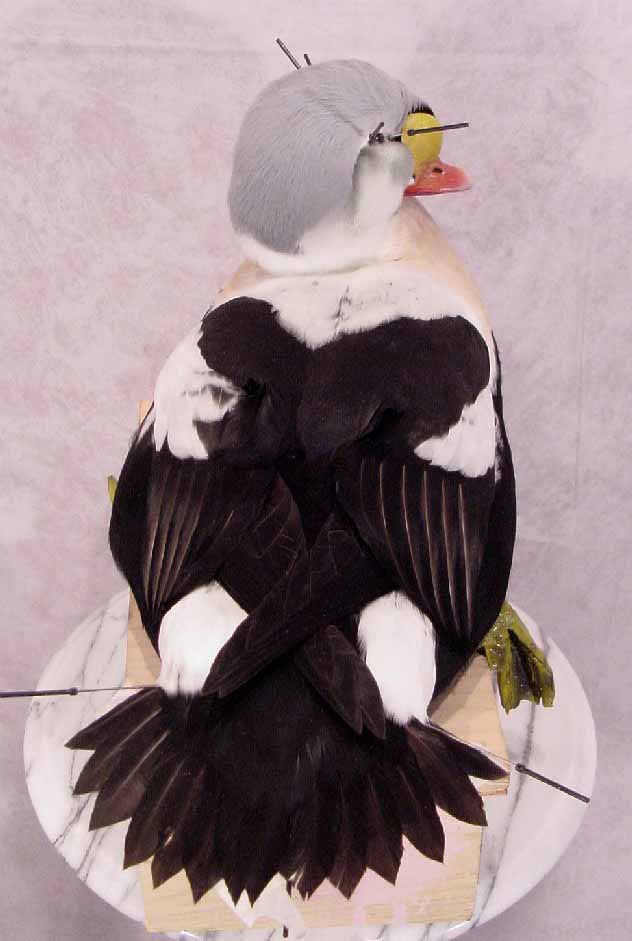 Head area in detail with pins inserted..
 Head area in detail with pins inserted..
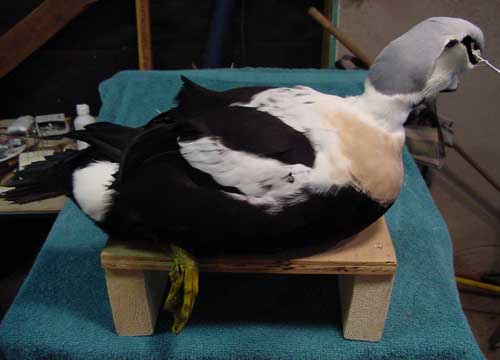
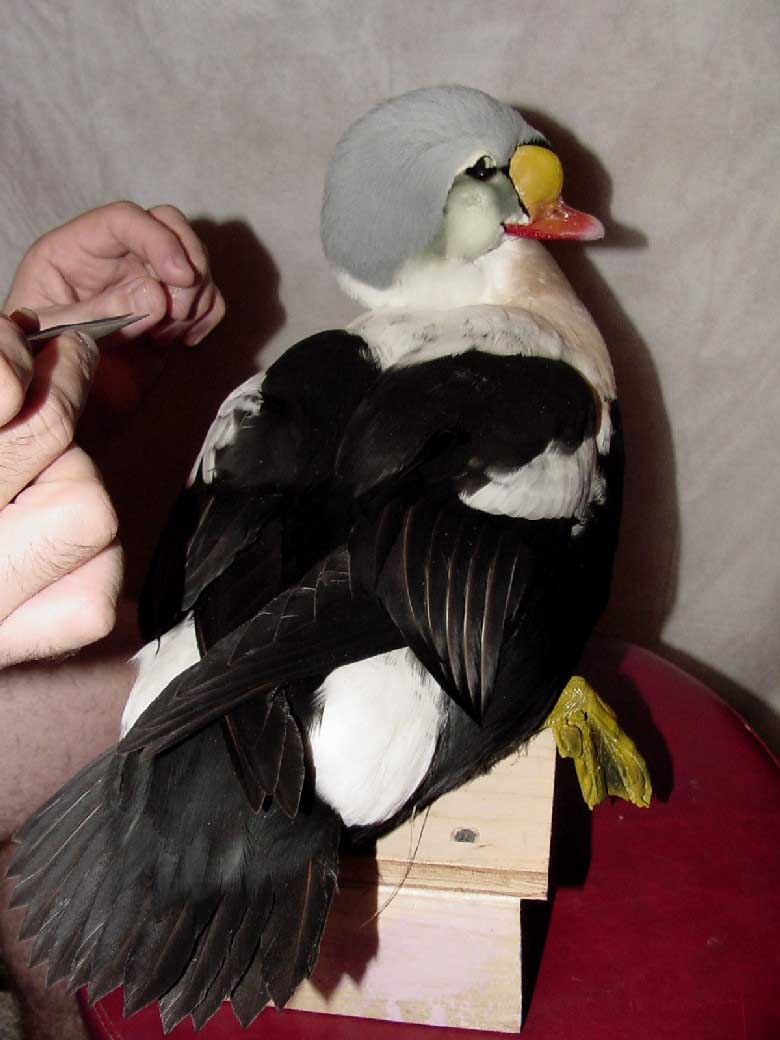
 I'm sure tomorrow I'll find things that need to be changed, but nothing major. I will have to touch up the paint on the bill where I touched it with superglue, and then put him on his final base..
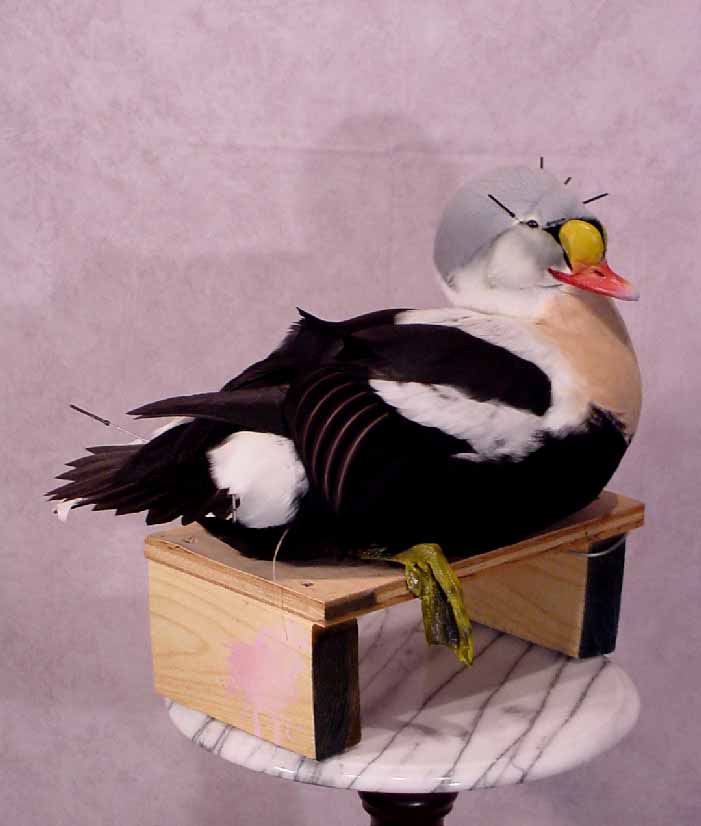 He will now go back into the freezer like this so I can get up tomorrow and groom him some more.. but this is what he is going to look like for the most part..
ITEMS
WANTED. Please respond via this on-line form HERE
with a description of what you have for sale.
[HOMEPAGE]
Taxidermy Links.
Please double click on the Taxidermy link icon below.
Taxidermy
Links
|